If you’ve read my other blog post about light pollution filters, you know I love them and they work really well especially with Deep sky images.
Like all other products in the market, there are several brands that make the same product (similar), one of the companies that make these awesome light pollution filters is Optolong
Recently, Optolong reached out to me and was asking about my experience with light pollution filters and they mentioned about one of their latest filters “L-Pro” filter, The description sounds good for the same, but you can’t tell unless you use it. I wasn’t in the market for new filters but asked them if they would like to send me their filters so I can test them out and yeah!!! they agreed and sent me 3 filters.
CLS and UHC are really good for deep sky photography, as they provide less transmission of light pollutants and enhancing the contrast between the background sky and the nebula.
CLS: Gives better results for objects that emit light in a broader spectrum, objects like reflection nebulae
UHC: Gives better results for objects that emit light in a narrow spectrum, objects like emission nebulae
Below is a comparison of the transmission charts for UHC and CLS
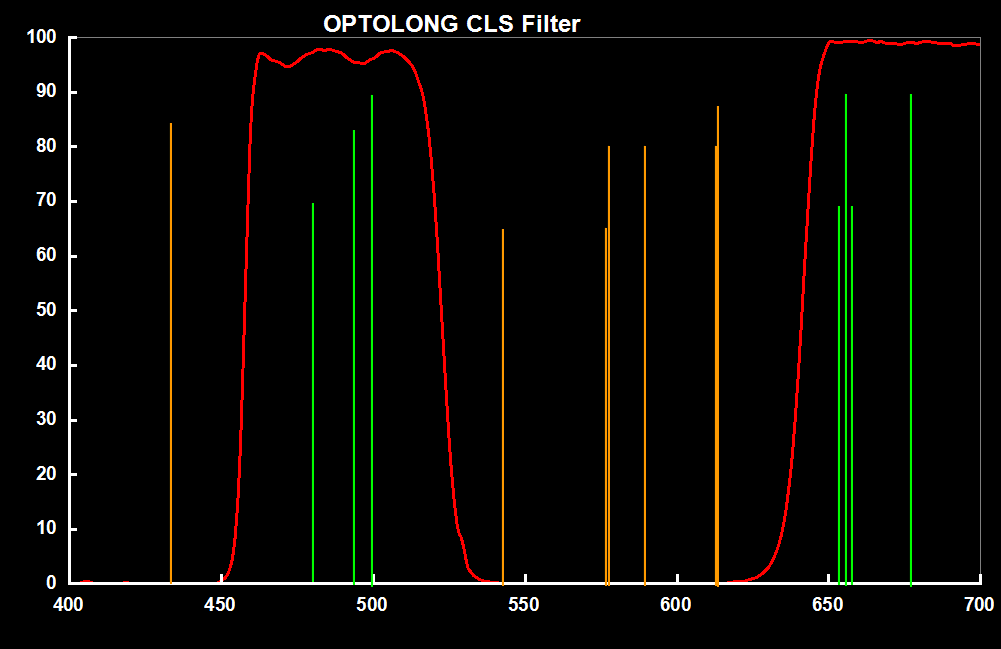
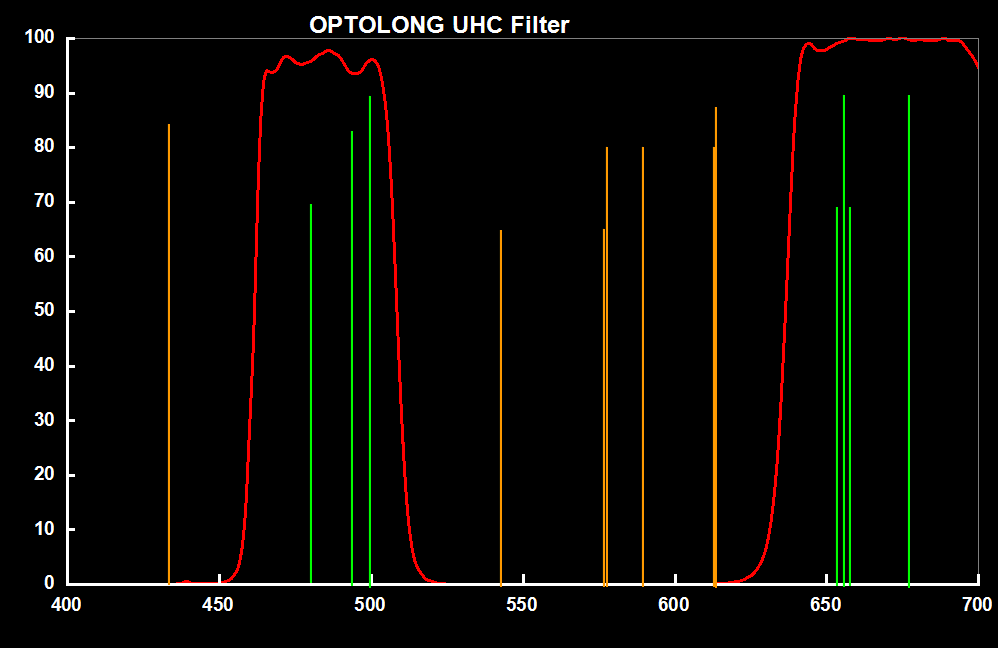
Unfortunately, New Zealand has had a bad run of weather lately, so did not have a chance to fully test the filters, especially the L-Pro on a nightscape image. Luckily, there was a break in the clouds for few hours and I got a chance to shoot the Eta Carina nebula (My fav region of the night sky)
One of the reasons to choose this target, was because it is a strong emission nebula. So, CLS and UHC would give pretty good results, the other main reason was that was the only object in the night sky after Orion has set.
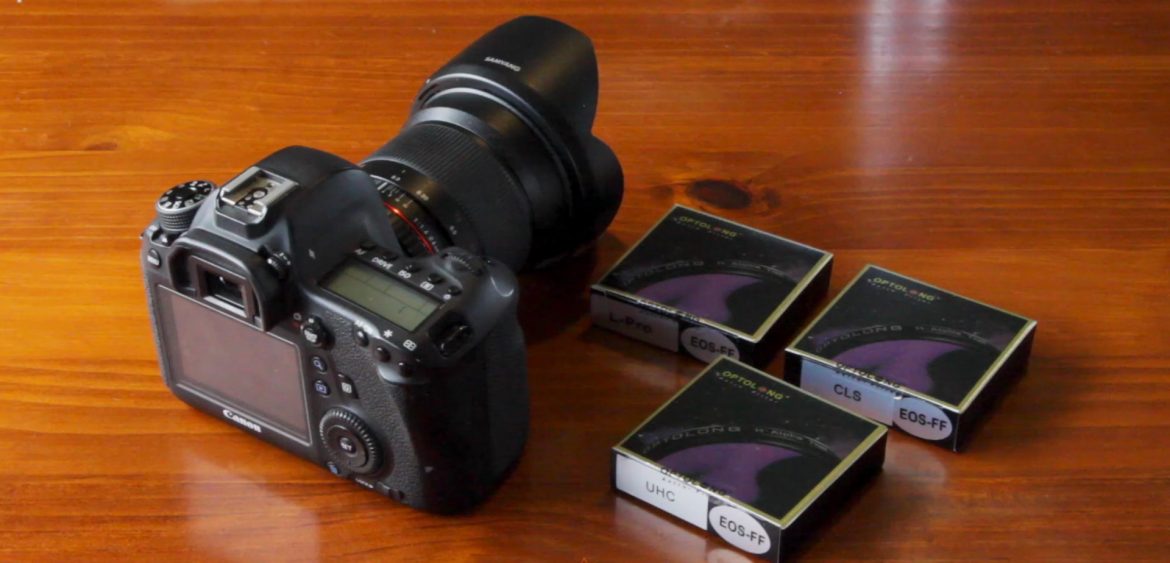
My setup for the session was rushed but did manage to get some good results. Below is a list of my setup and few photos of the same.
- Canon 6D
- Tamron 70-200 f/2.8 Lens
- iOptron Skytracker
- Optolong CLS Filter
- Optolong UHC Filter
- Optolong L-Pro Filter
As mentioned previously, the setup was rushed and if you look at the crazy angle the camera is at, it was hard to get it right and I could see clouds rolling in, so did not bother setting it perfectly. The settings I used for the images are as follows:
- DSLR: 30sec, f/2.8, ISO 3200, 200mm
- CLS: 30sec, f/2.8, ISO 3200, 200mm
- UHC: 30sec, f/2.8, ISO 3200, 200mm
- L-Pro: 30sec, f/2.8, ISO 3200, 200mm
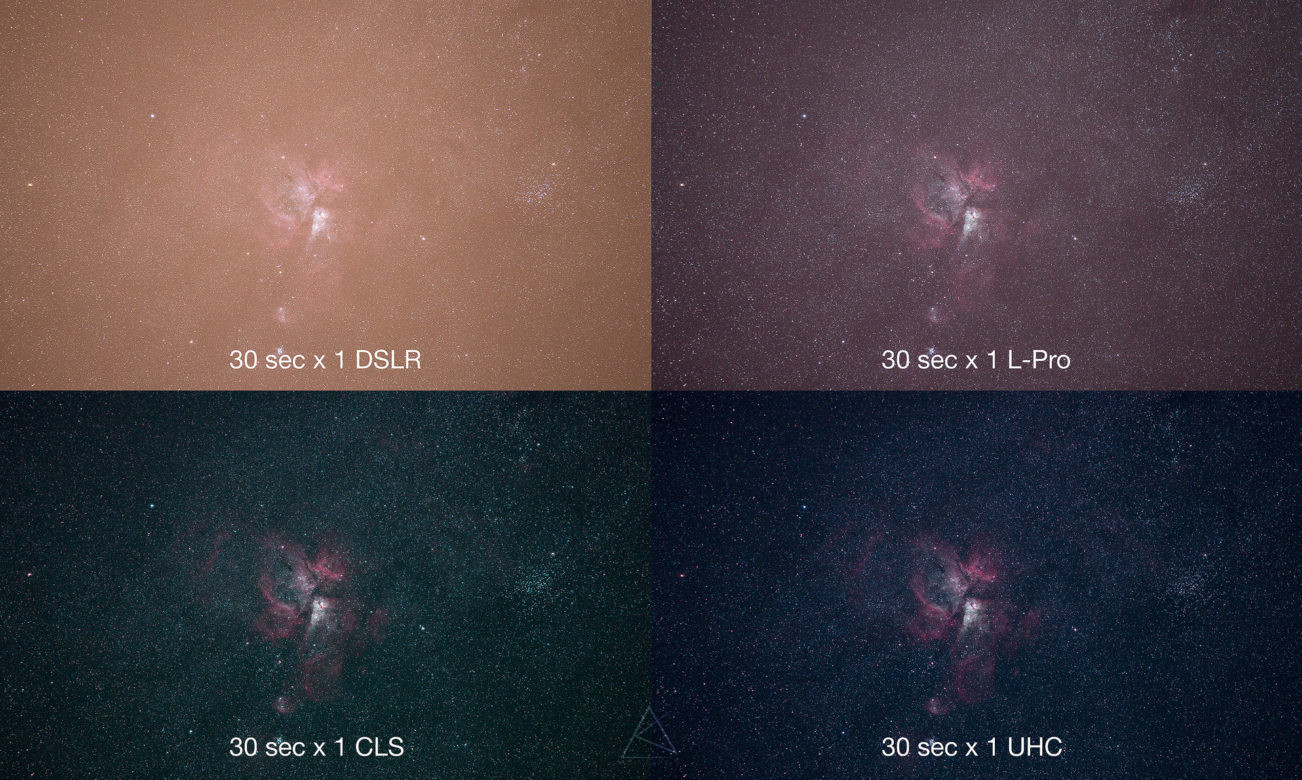
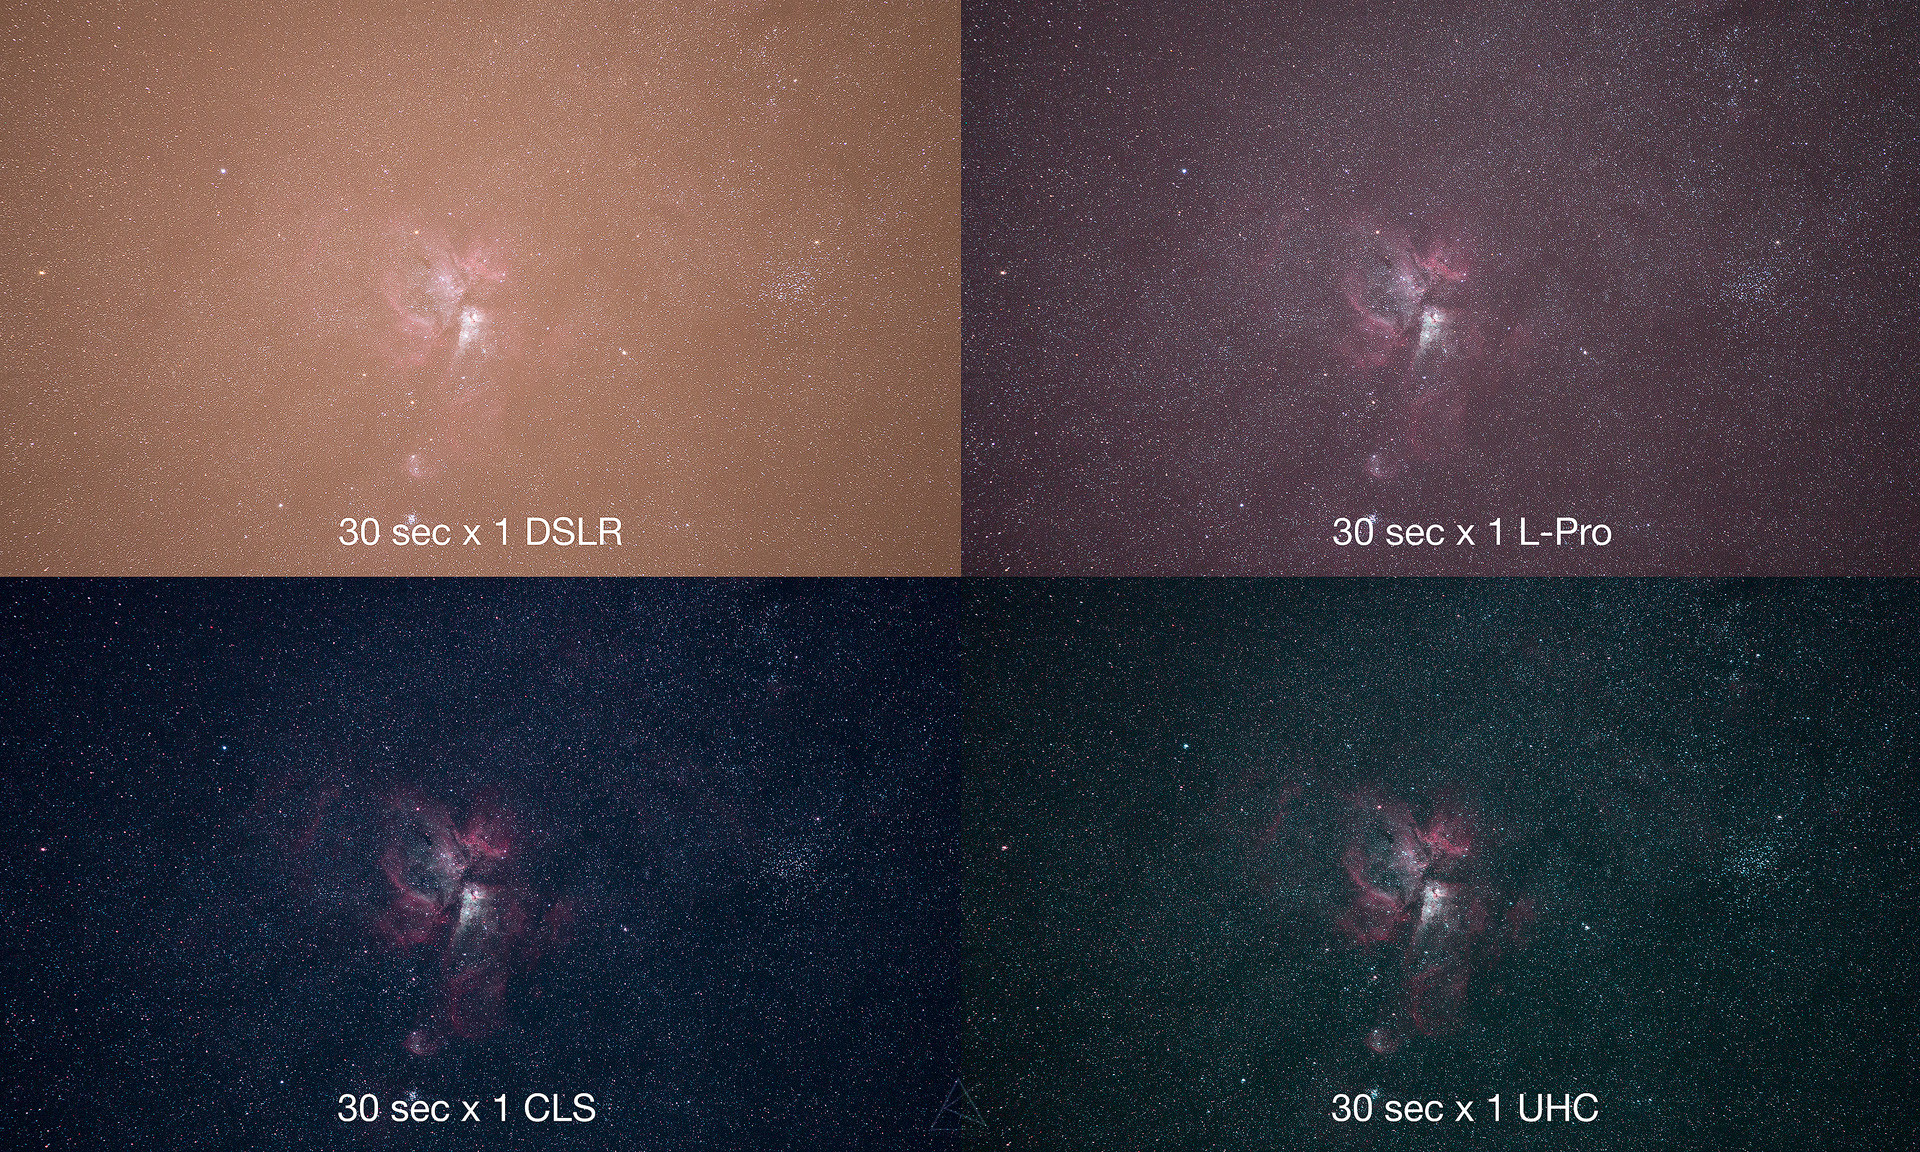
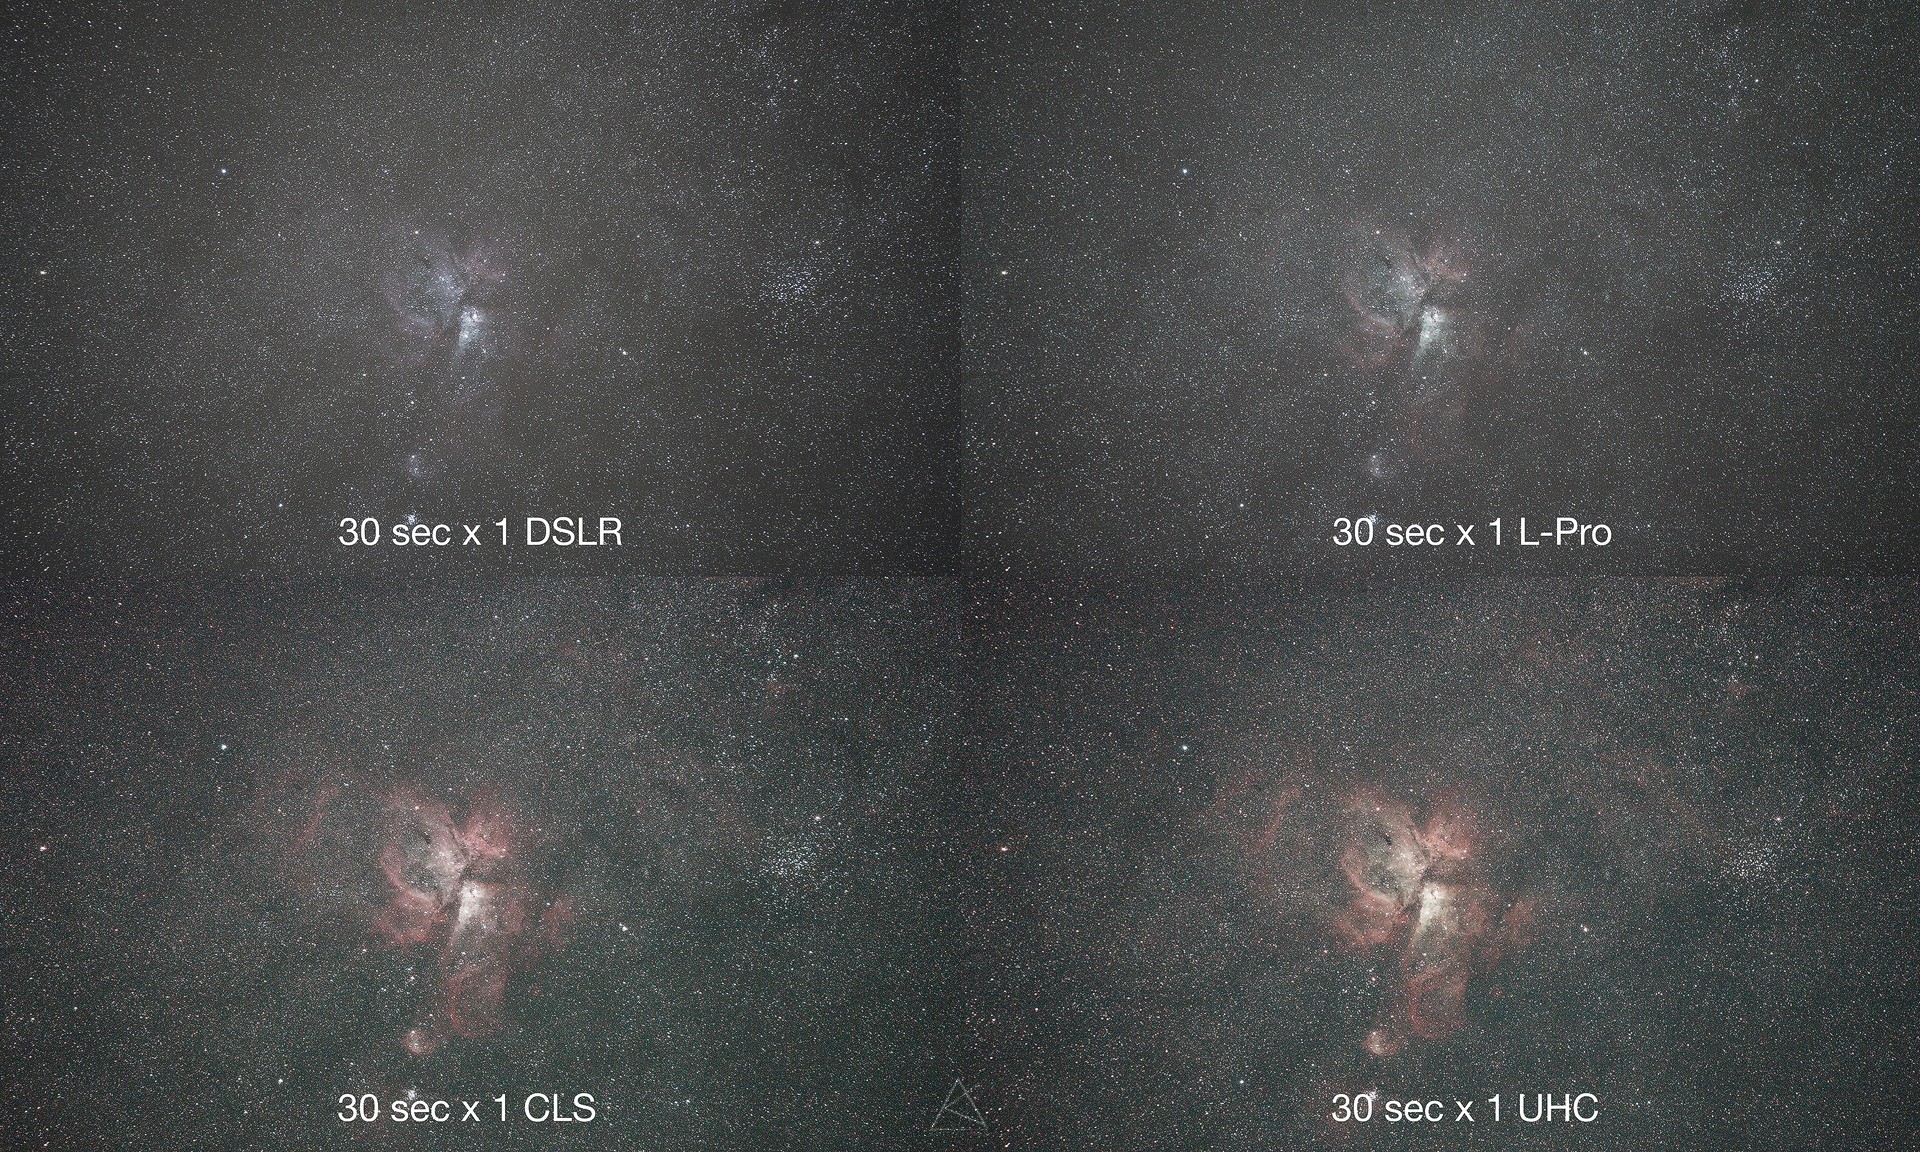
Here is a comparison of all the images together. These images are Straight out of the camera (SOOC)
Here is a 1-1 comparison.
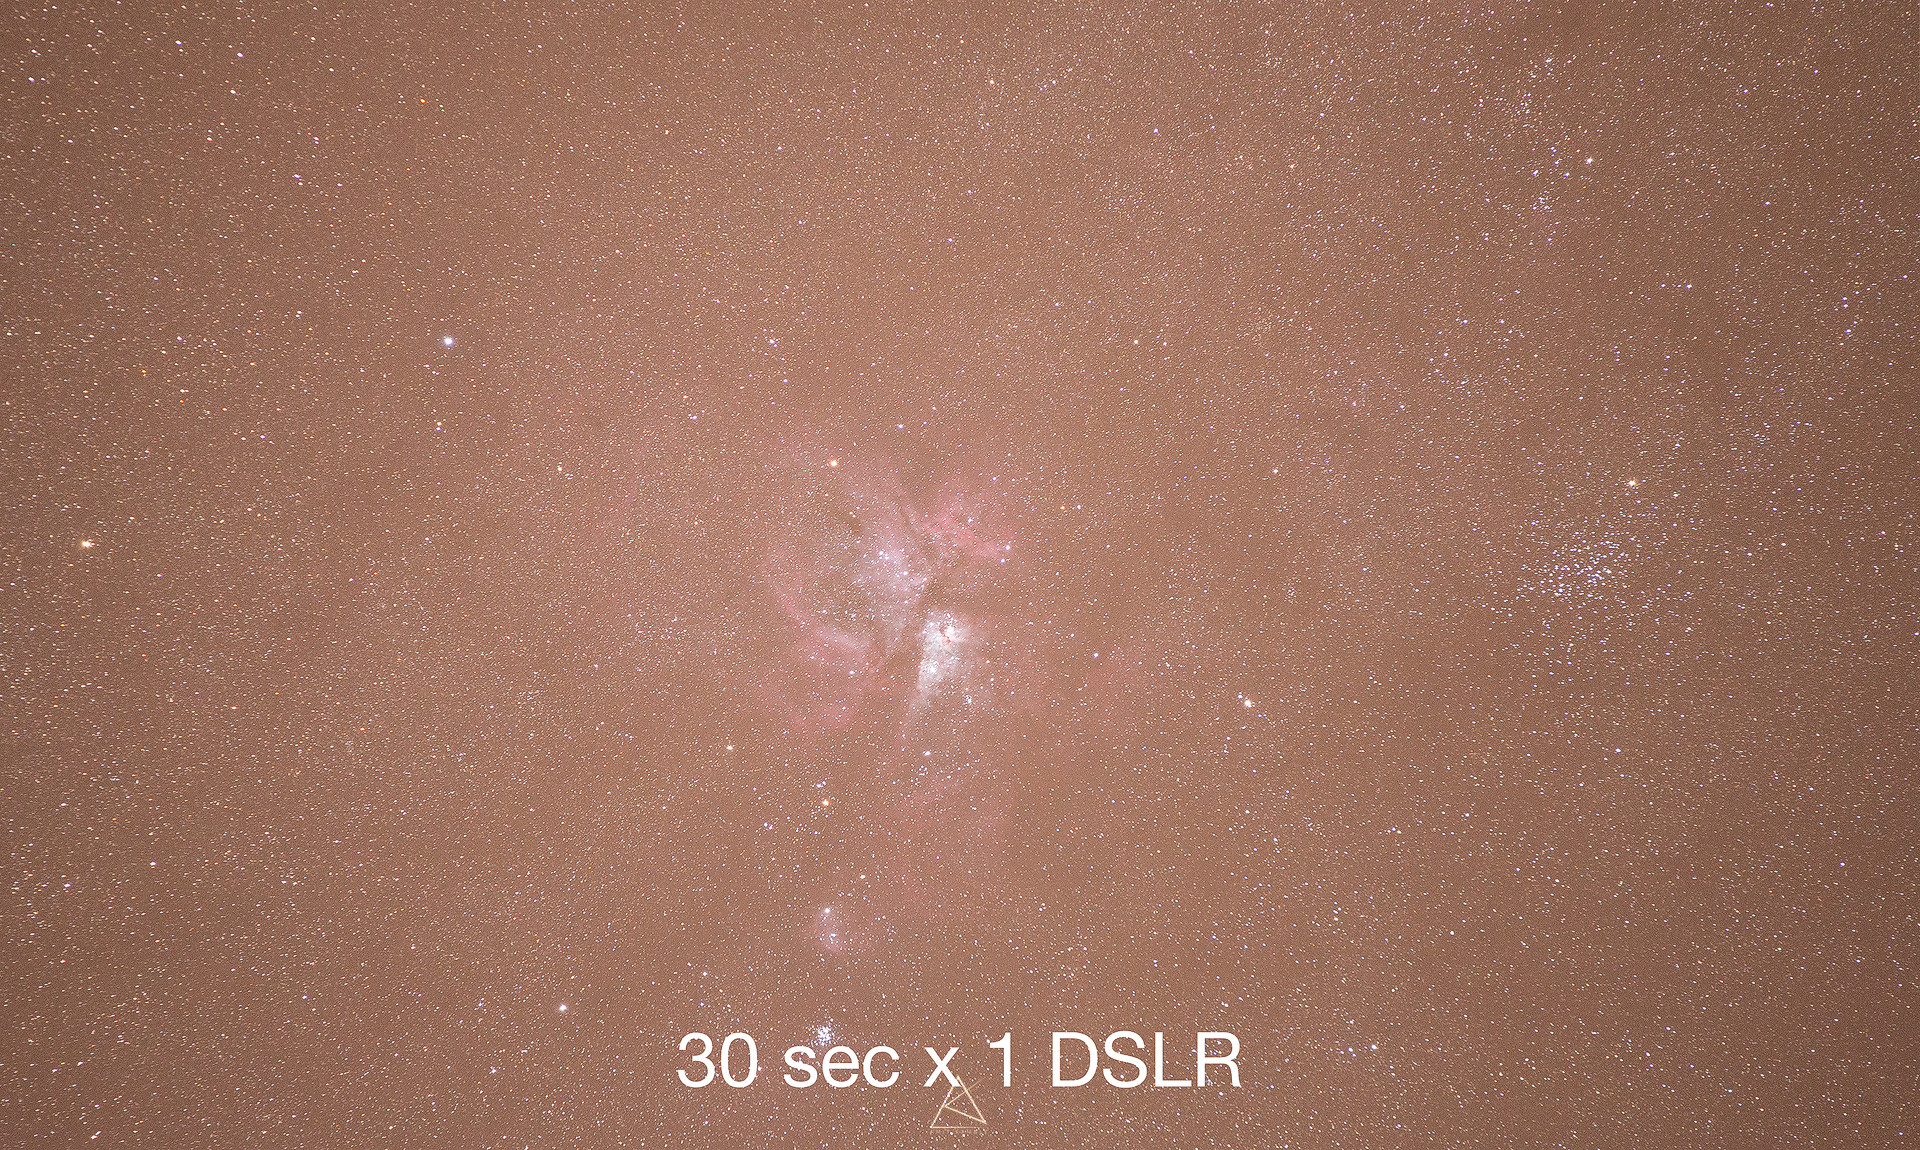
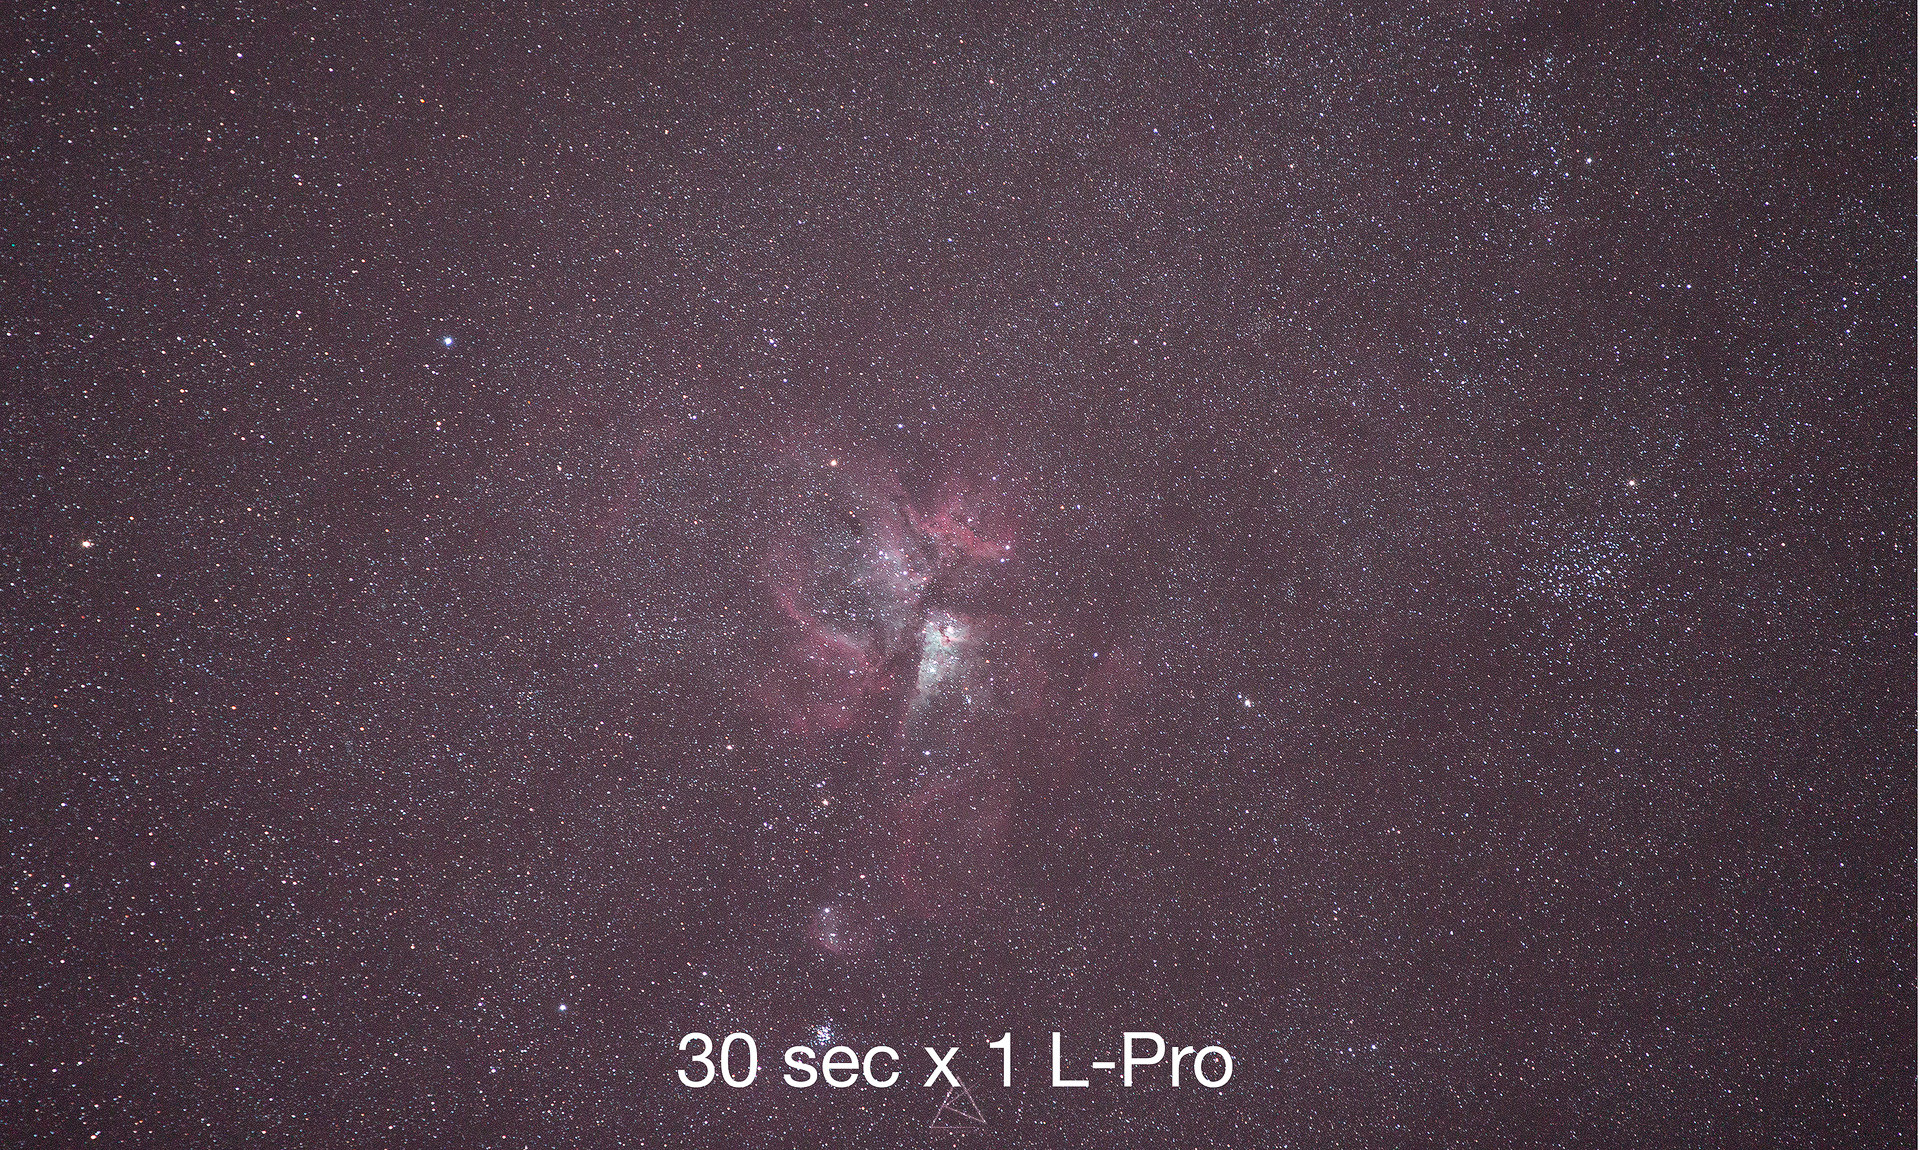
DSLR / L-PRO
You can easily see the difference between the 1st and 2nd images. L-Pro gives a well-balanced image with all the orange glow suppressed (Light Pollutants)
CLS / UHC
In this comparison, it’s easy to see the high contrast that the UHC filter gives, which is why is good for deep sky (emission nebulae) objects.
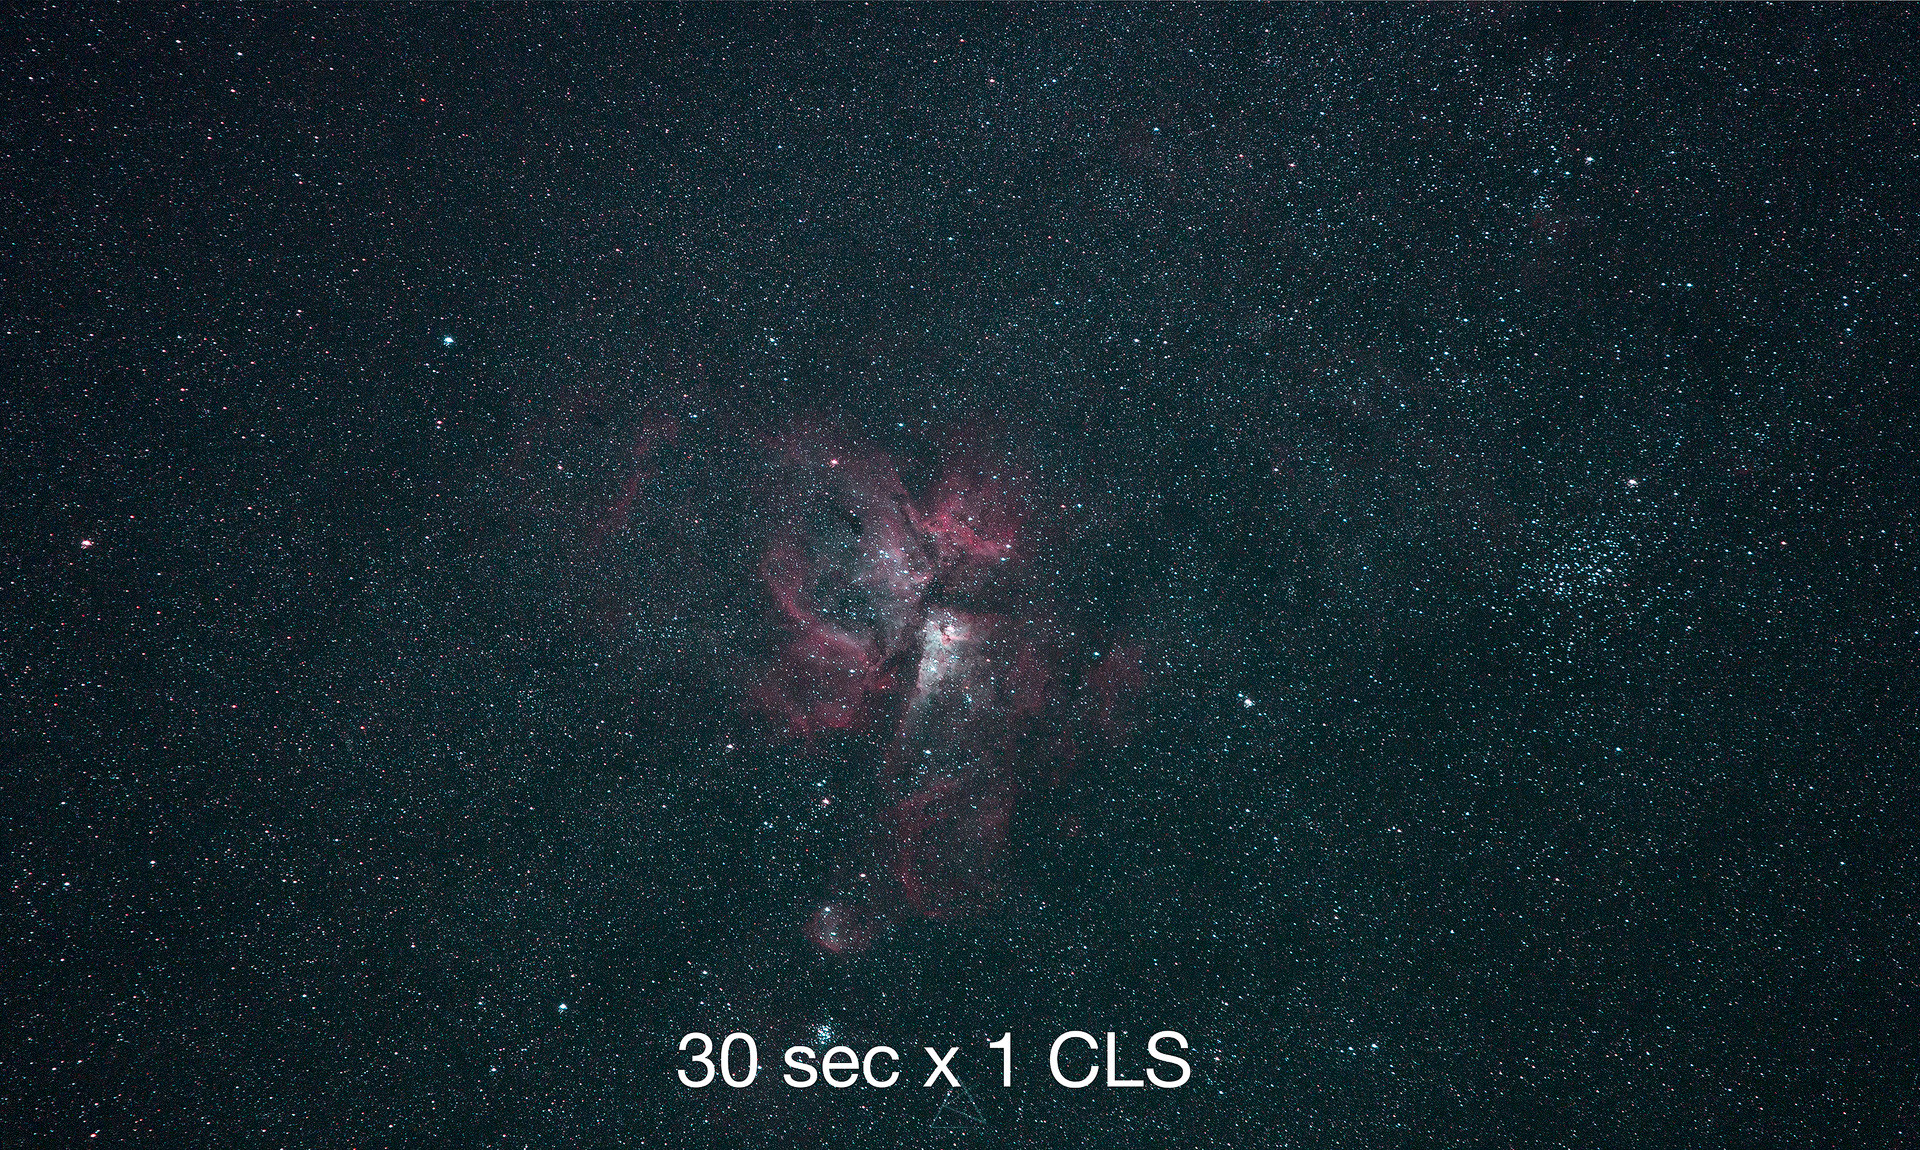
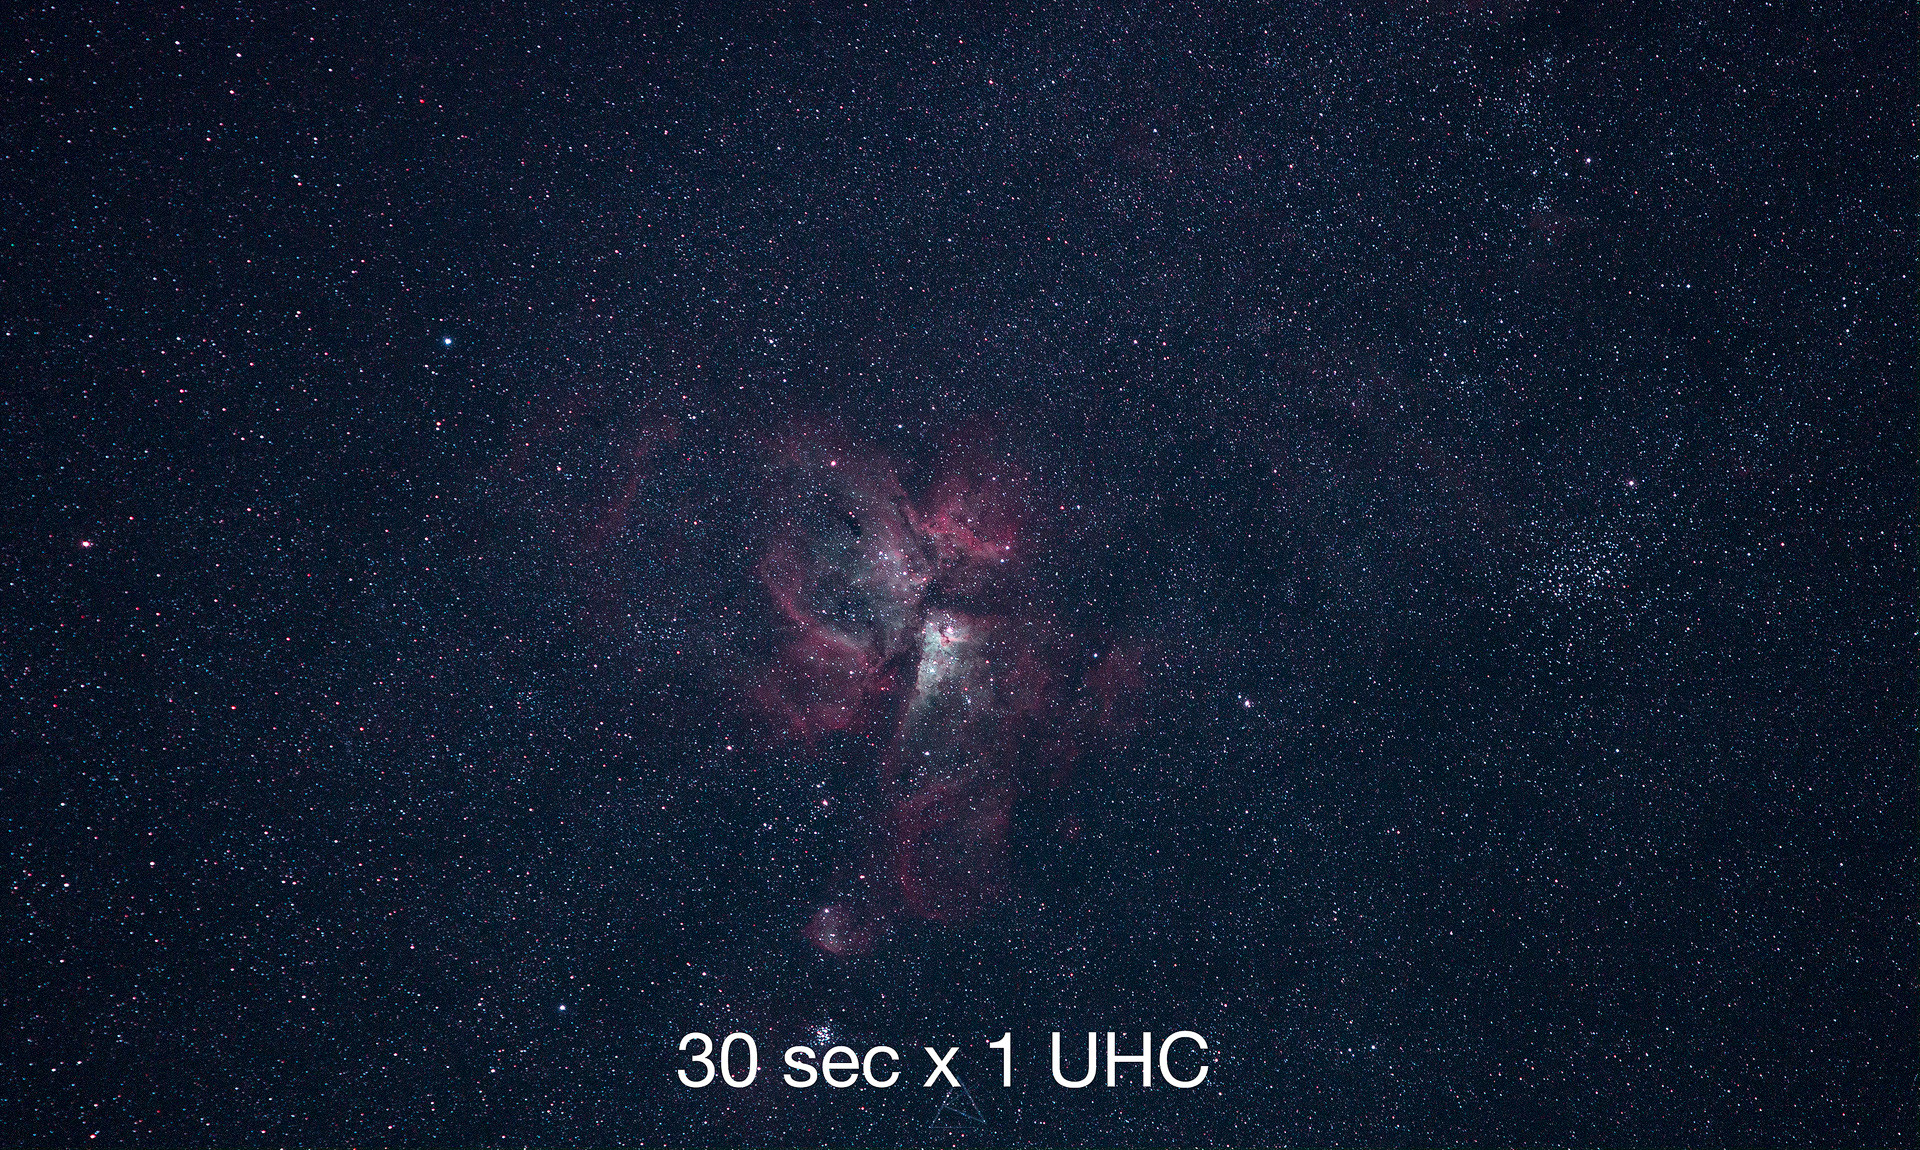
The above images are single shots, but how do they look once they have gone through some processing and stacking, below images are a comparison of SOOC images vs Processed. I use Pixinsight for processing images so the basic processing on the image below is as follows:
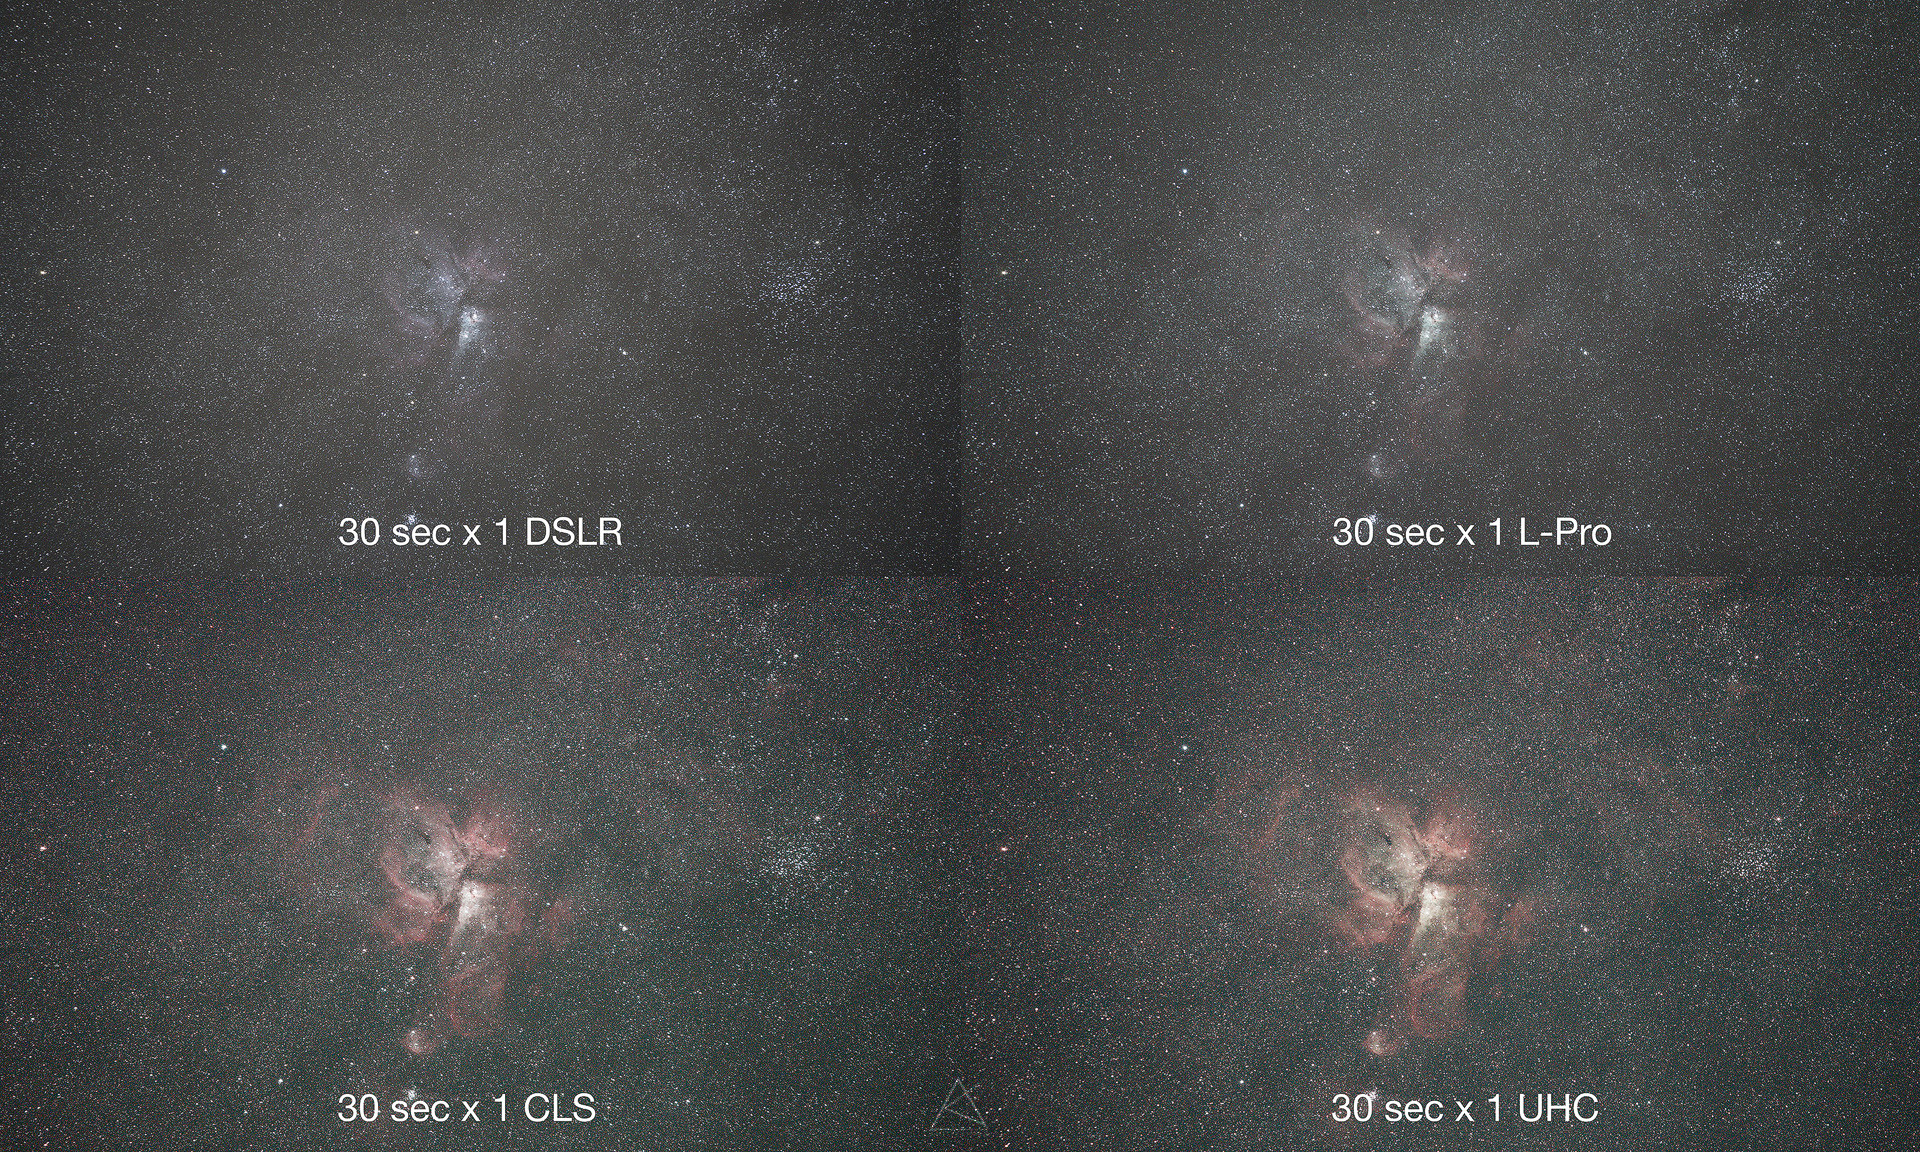
The data from these filters really shine when they are stacked (Now, why would you not stack a deep sky image??)
Here is a comparison of single frame to stacked (with some basic processing)
- Histogram Transformation
- Automatic Background Extraction
- Morphological Transform (Erosion, passes = 2, amount = 40) x 2 using a star mask
- LRGB Combination (Saturation = 300, Chrominance Noise = enabled) with the L Channel extracted from the image)
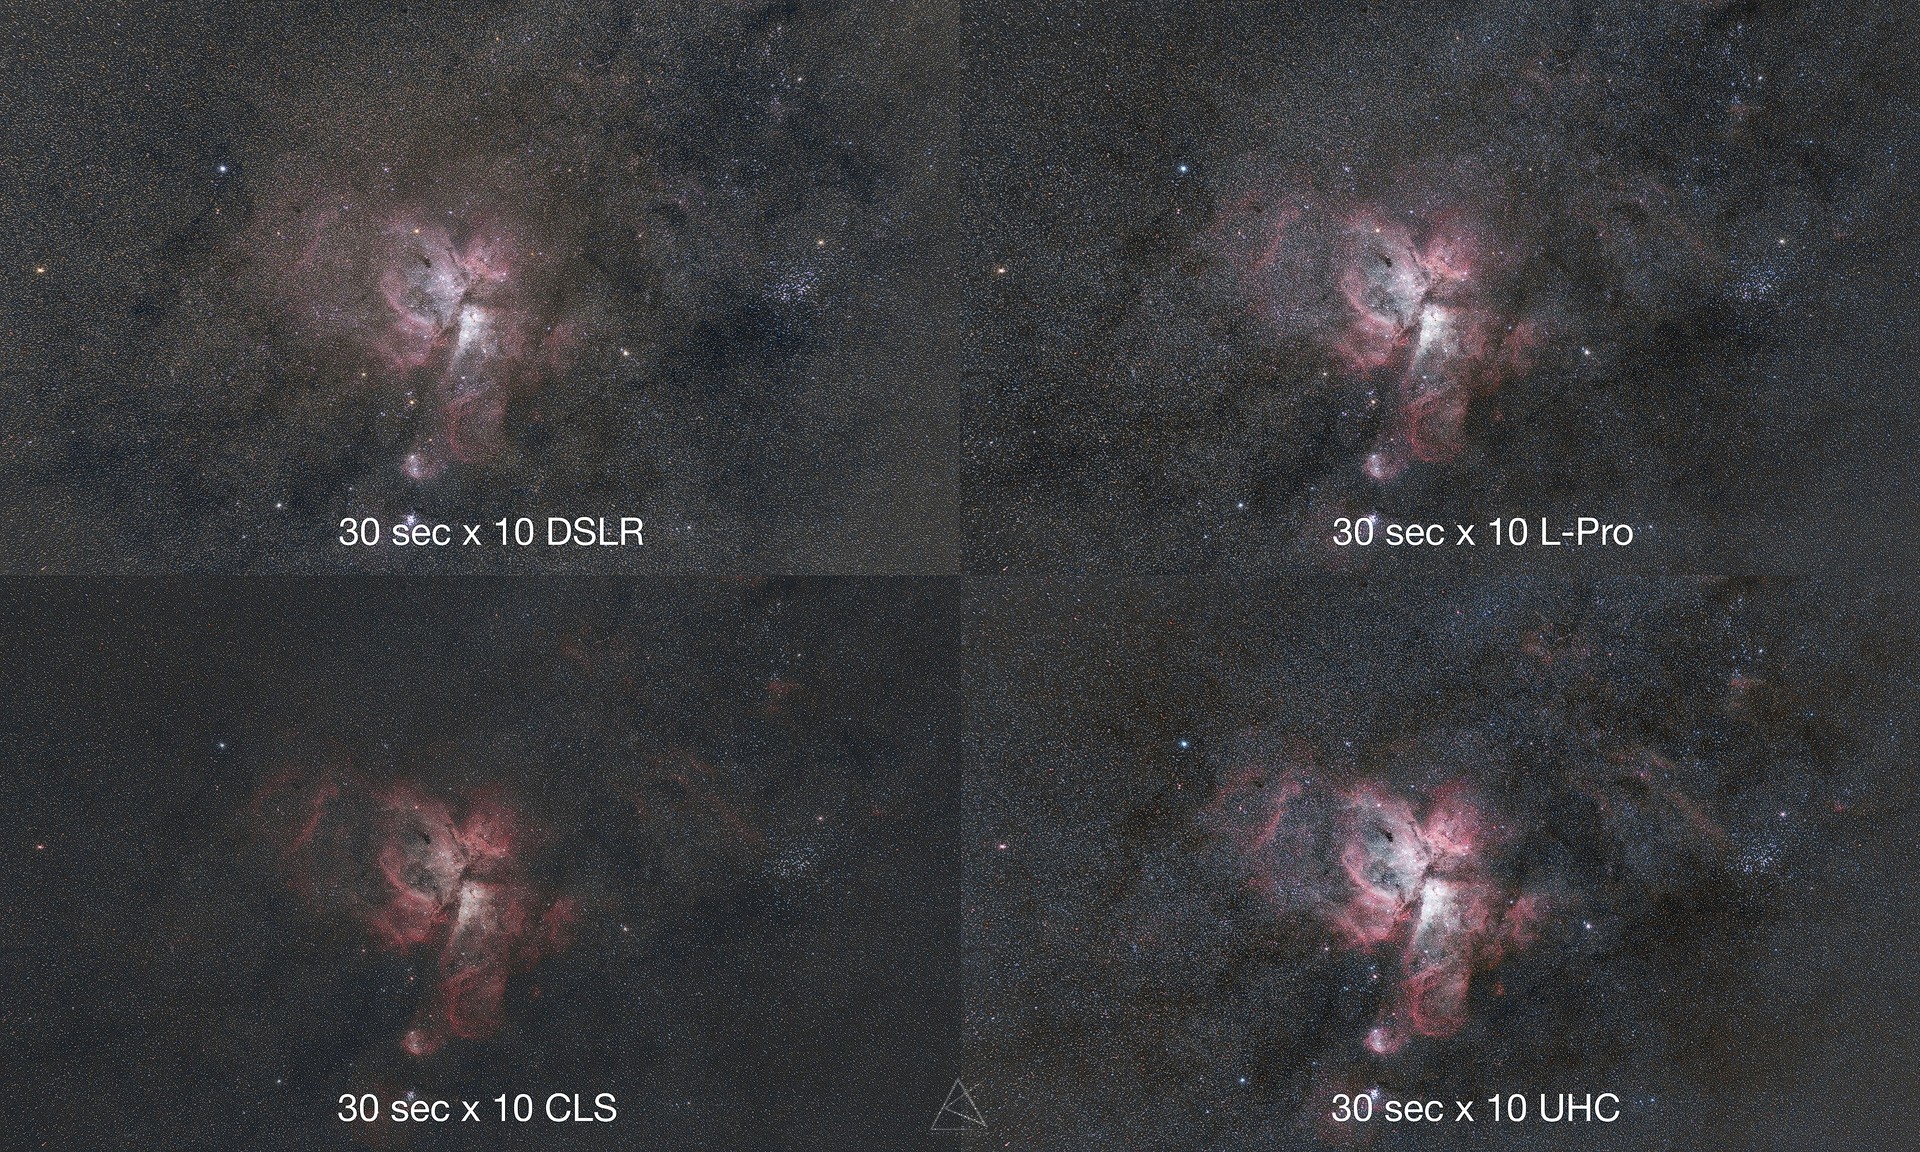
For some strange reason, the final stack image from CLS has very low contrast, I haven’t seen this with my other filter, so might have to investigate on that, but from the above comparison, you can easily see that UHC and L-Pro really stand out.
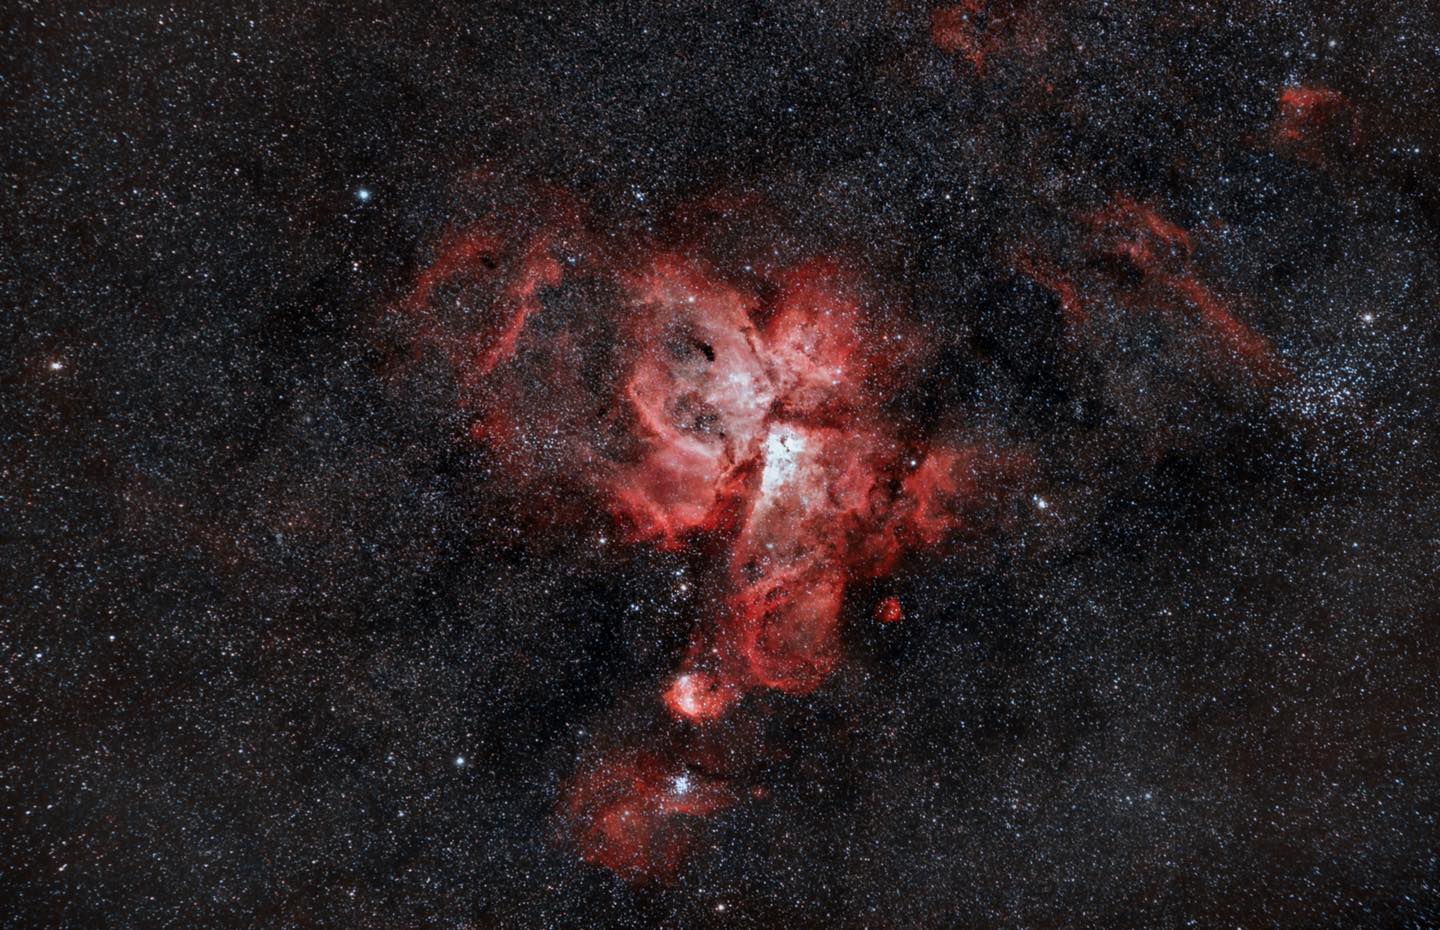
Here is a quick final processing of the image (Would be much better if I spent some more time on it)
Update**
Few days after the above image was shot, I got a chance to head out for a dark sky night organised by the Auckland Astronomical Society.
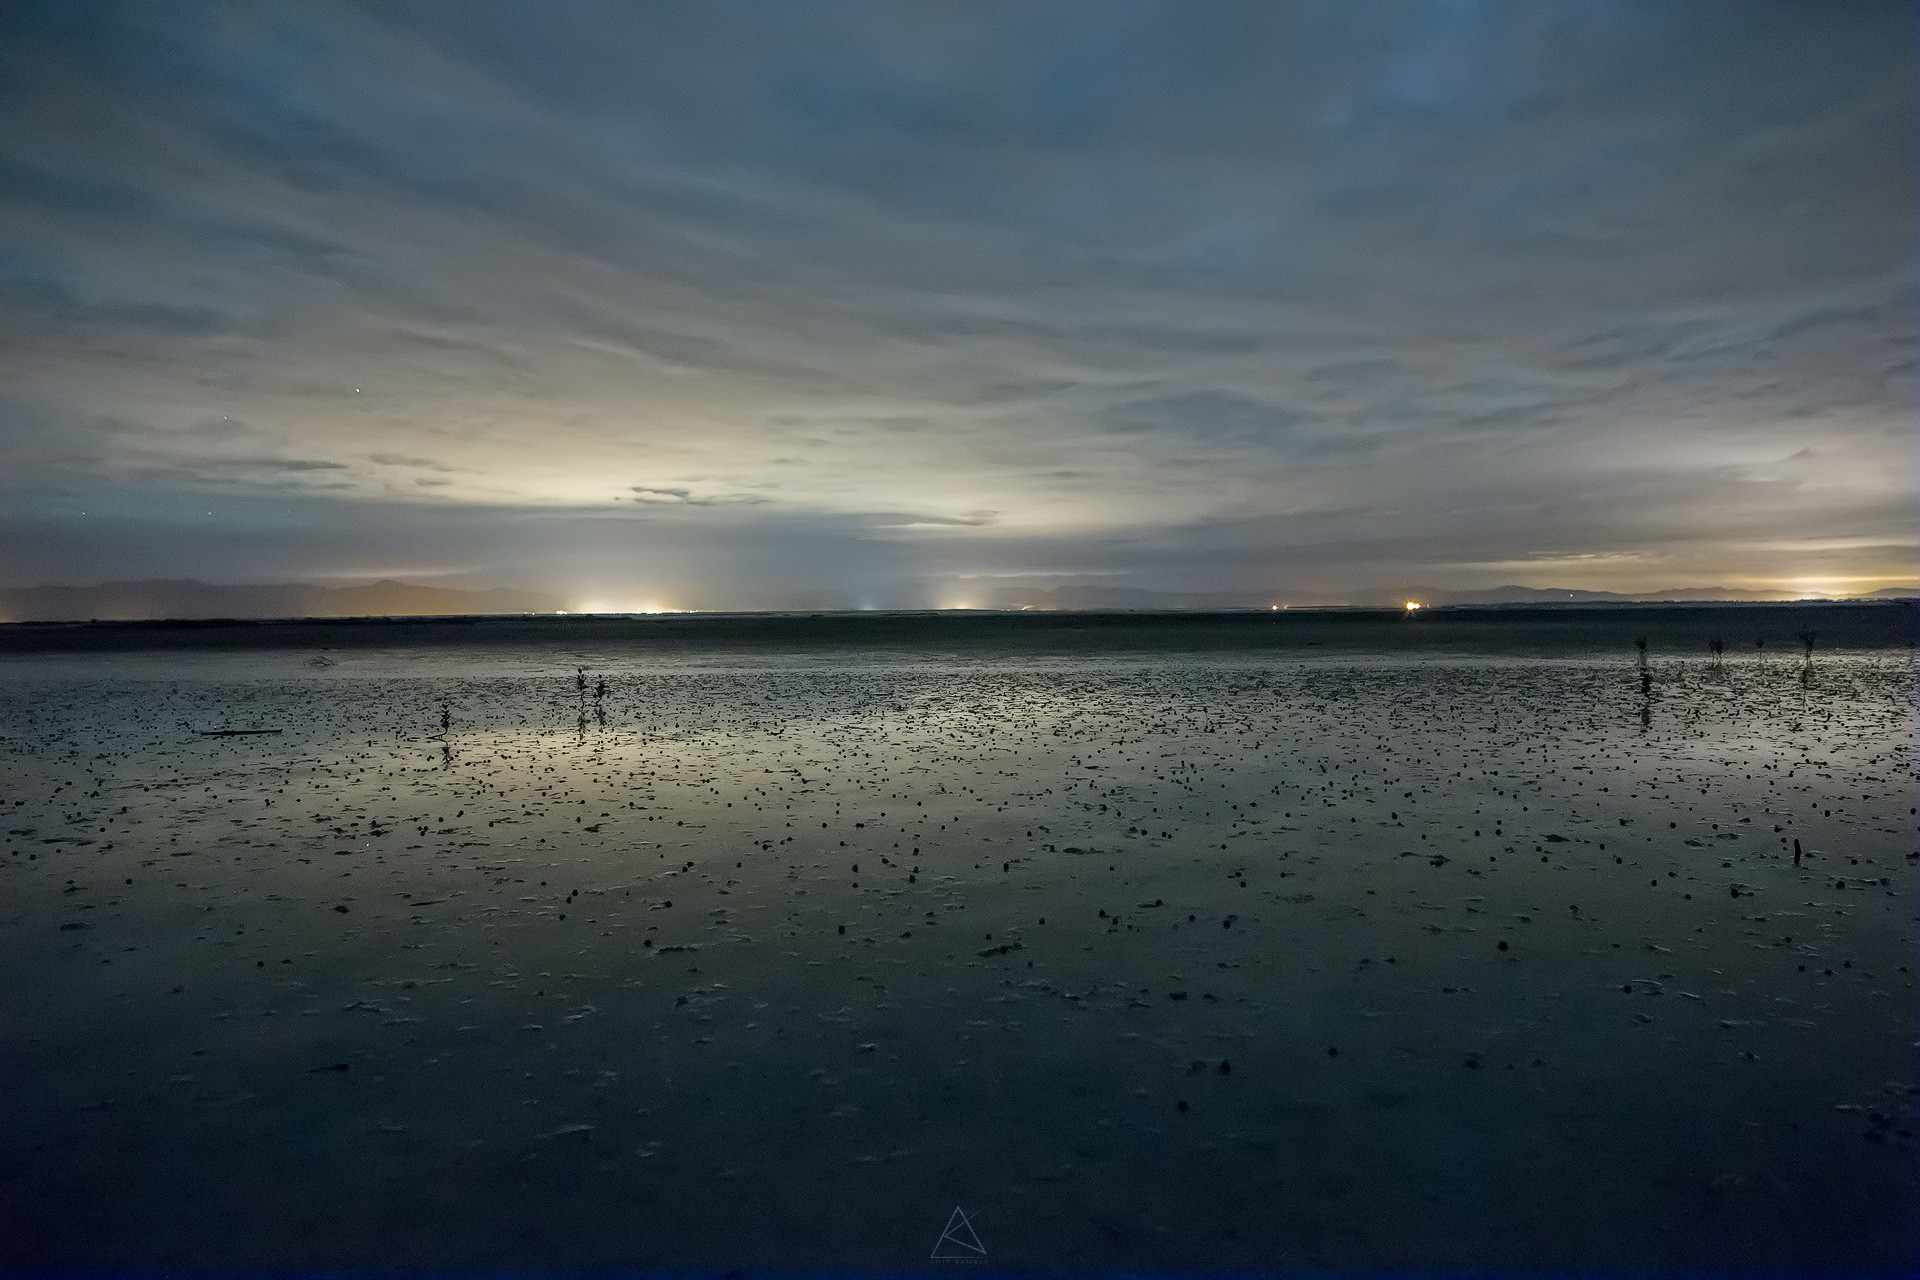
The first night turned out pretty bad because of the cloud cover but happens that it was a good time to test out some light pollution filters, just to see how they perform in purely getting rid of the light pollution.
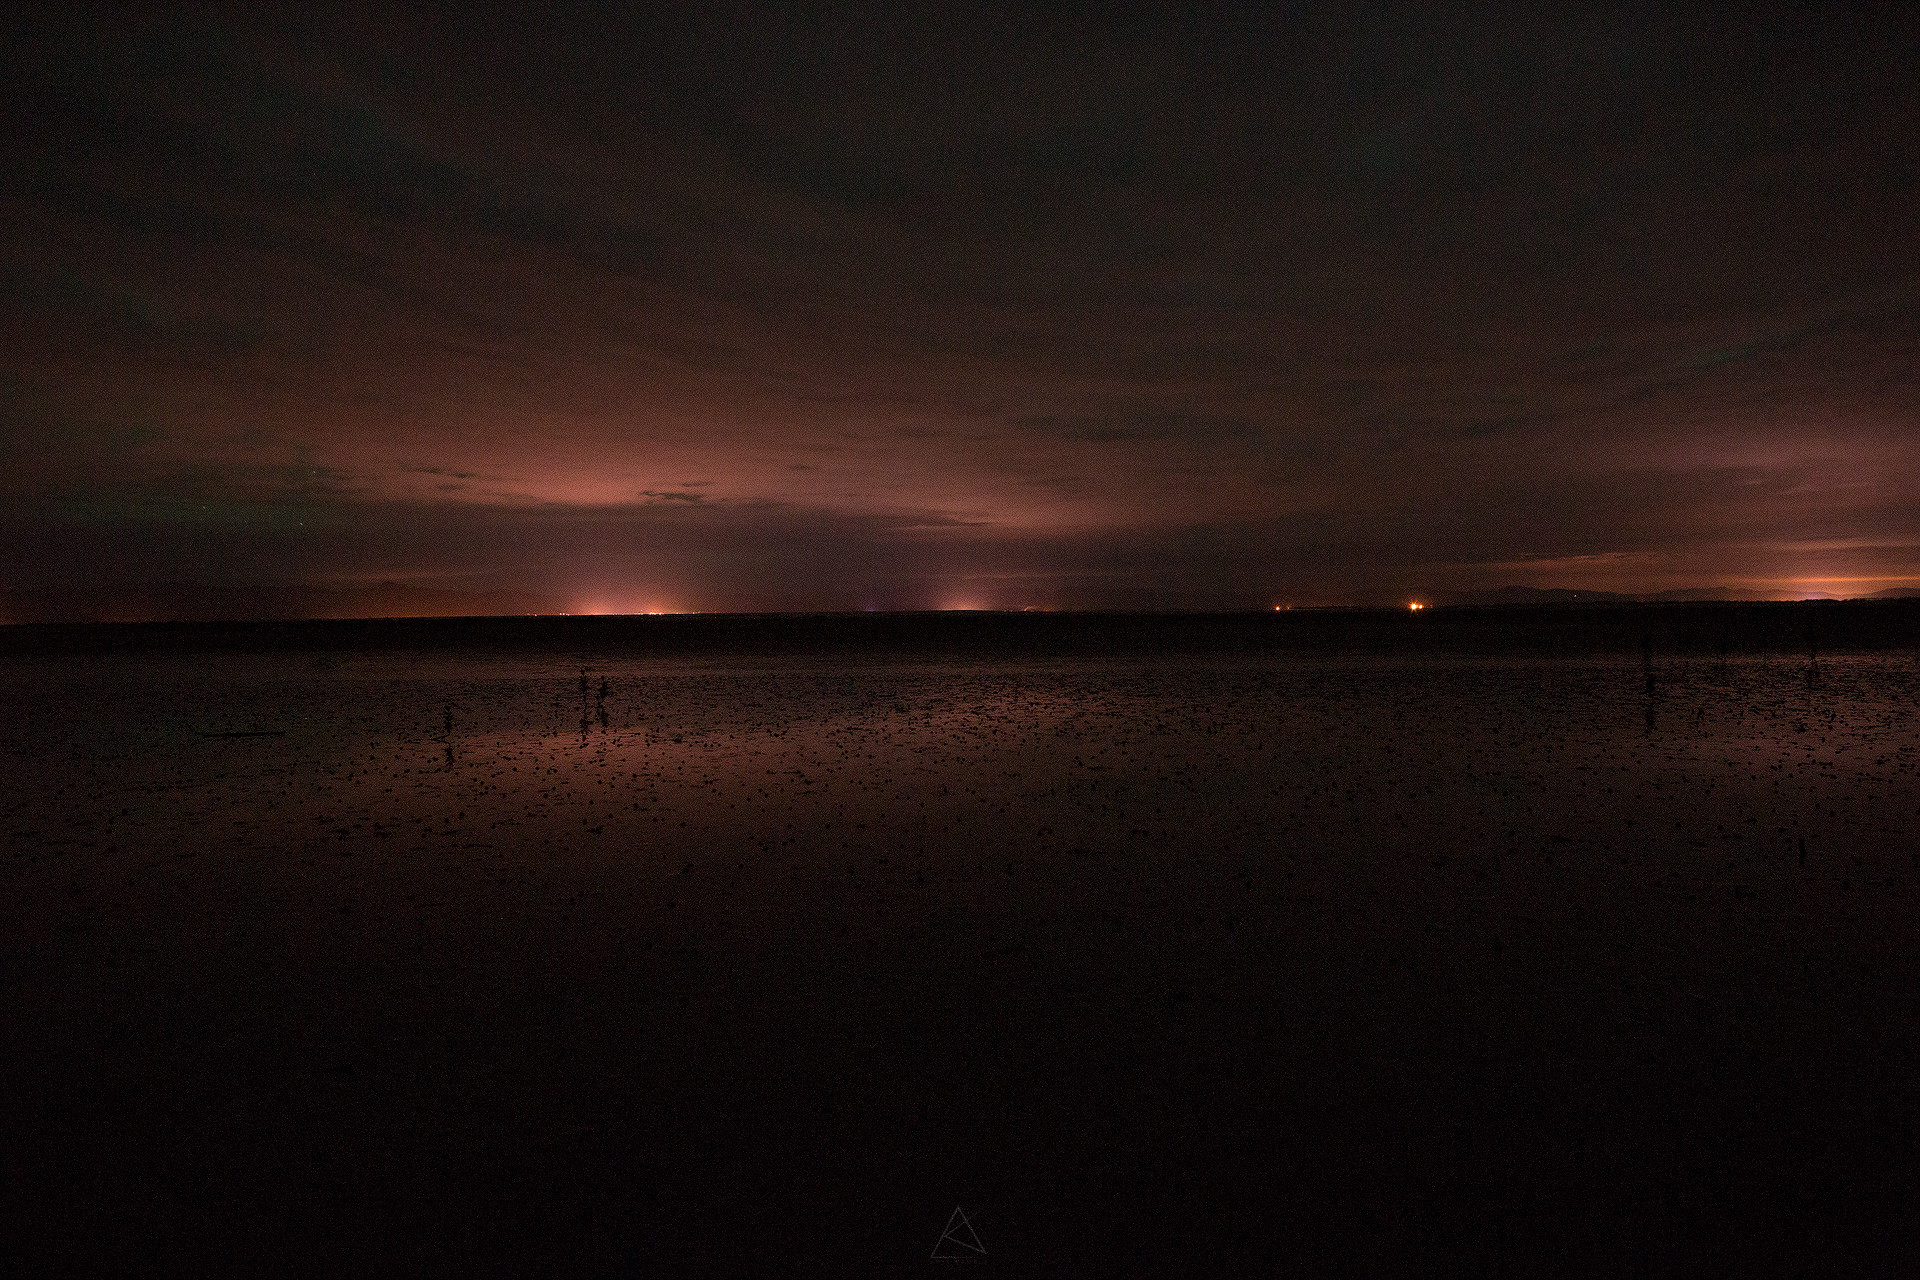
Here is a set of images shot with and without the filter Straight out of the camera (SOOC) shot at:
15sec, ISO 6400, f/2.8 at 24mm using Samyang 24mm f/1.4 on Canon 6D
- Control (Without any filters) / Corrected (WB: 2900/+3 , Exp: +1.35)
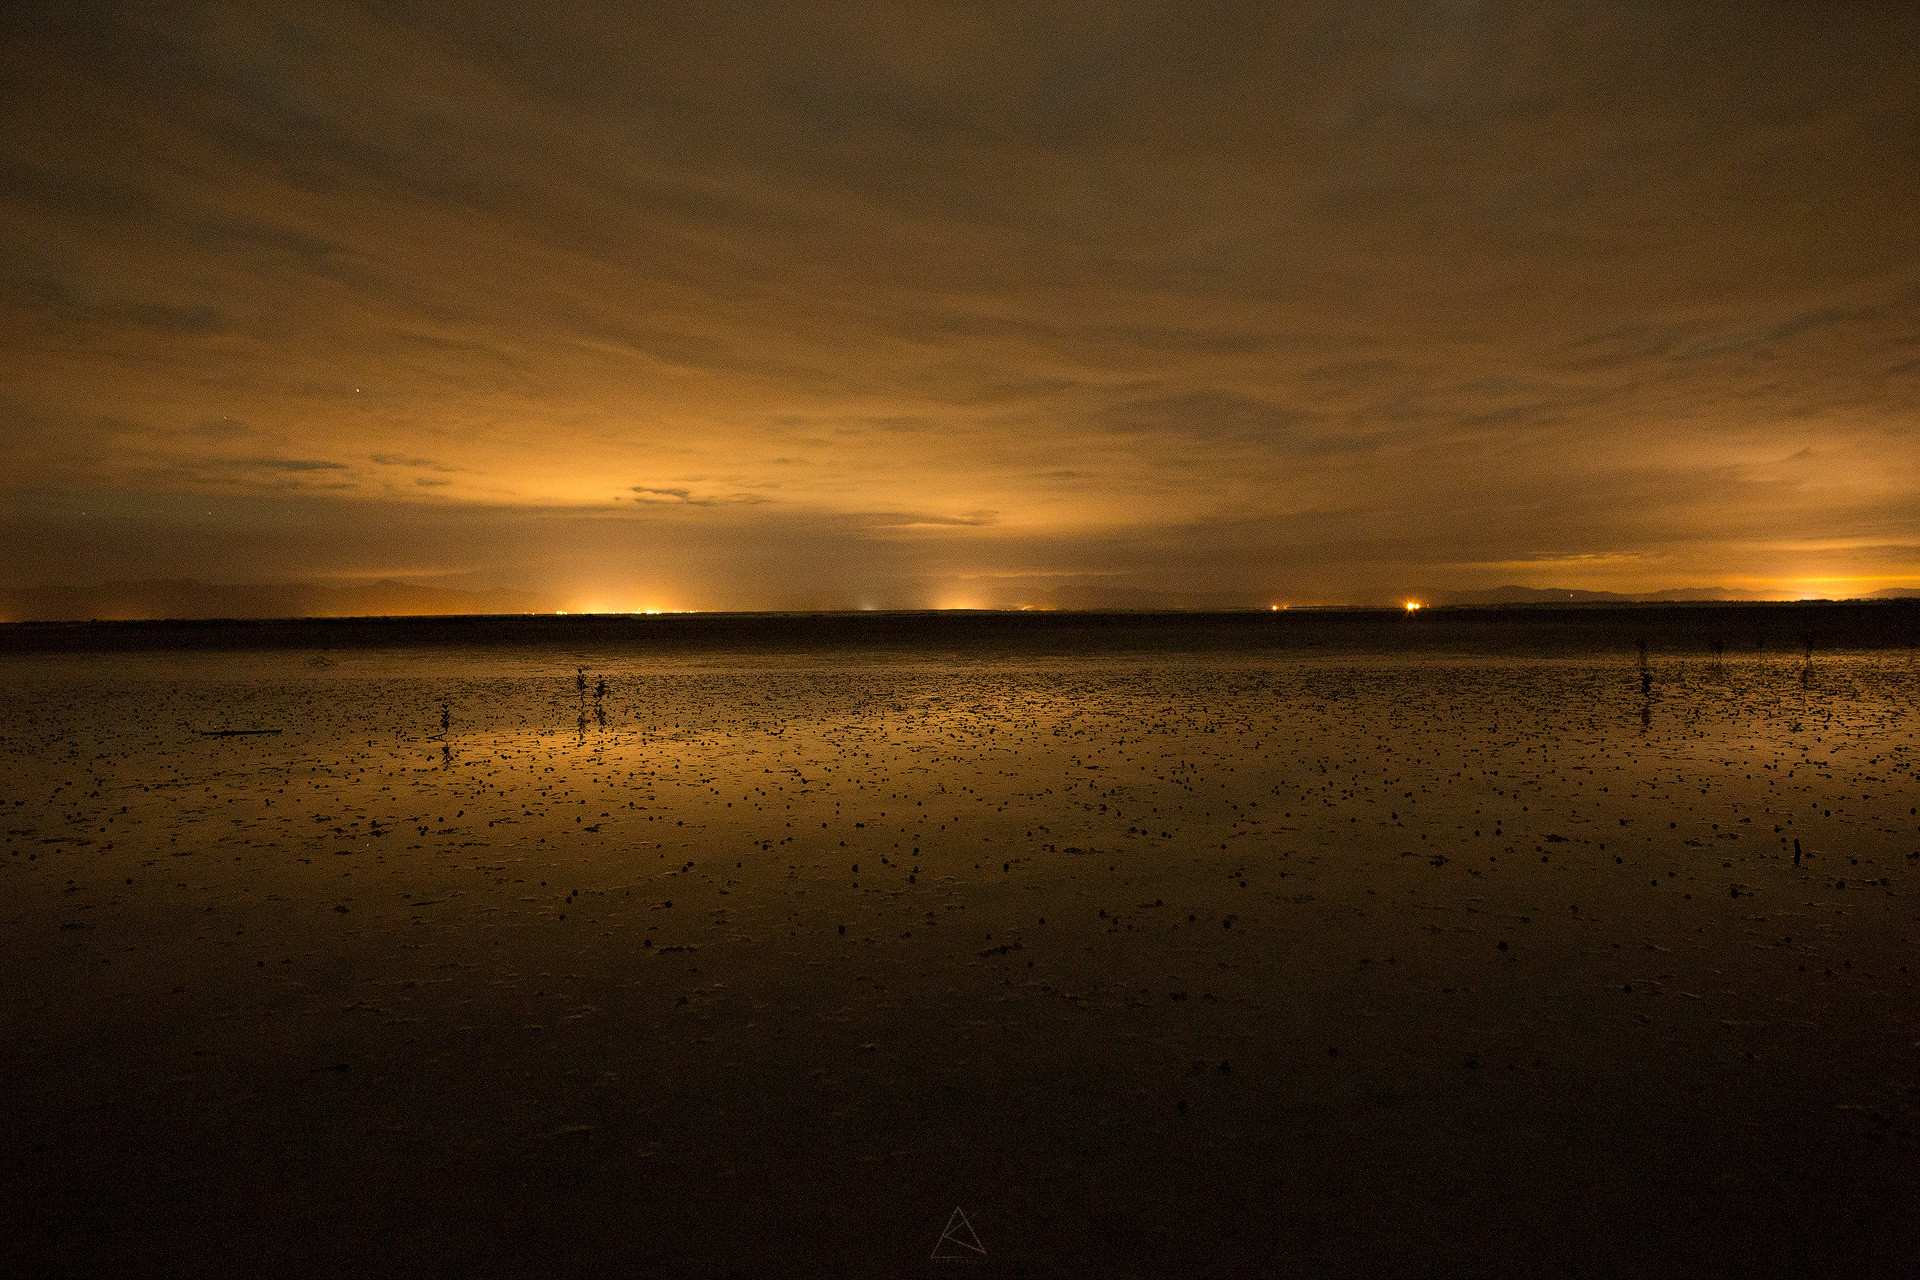
- L-Pro Filter – The filter does exactly what it is intended to do, but as you would notice unlike any other filter it cuts the total amount of light hitting the sensor and hence would require a longer exposure or higher ISO to match one without a filter. /Corrected (WB: 3550/-36 , Exp: +2.50)
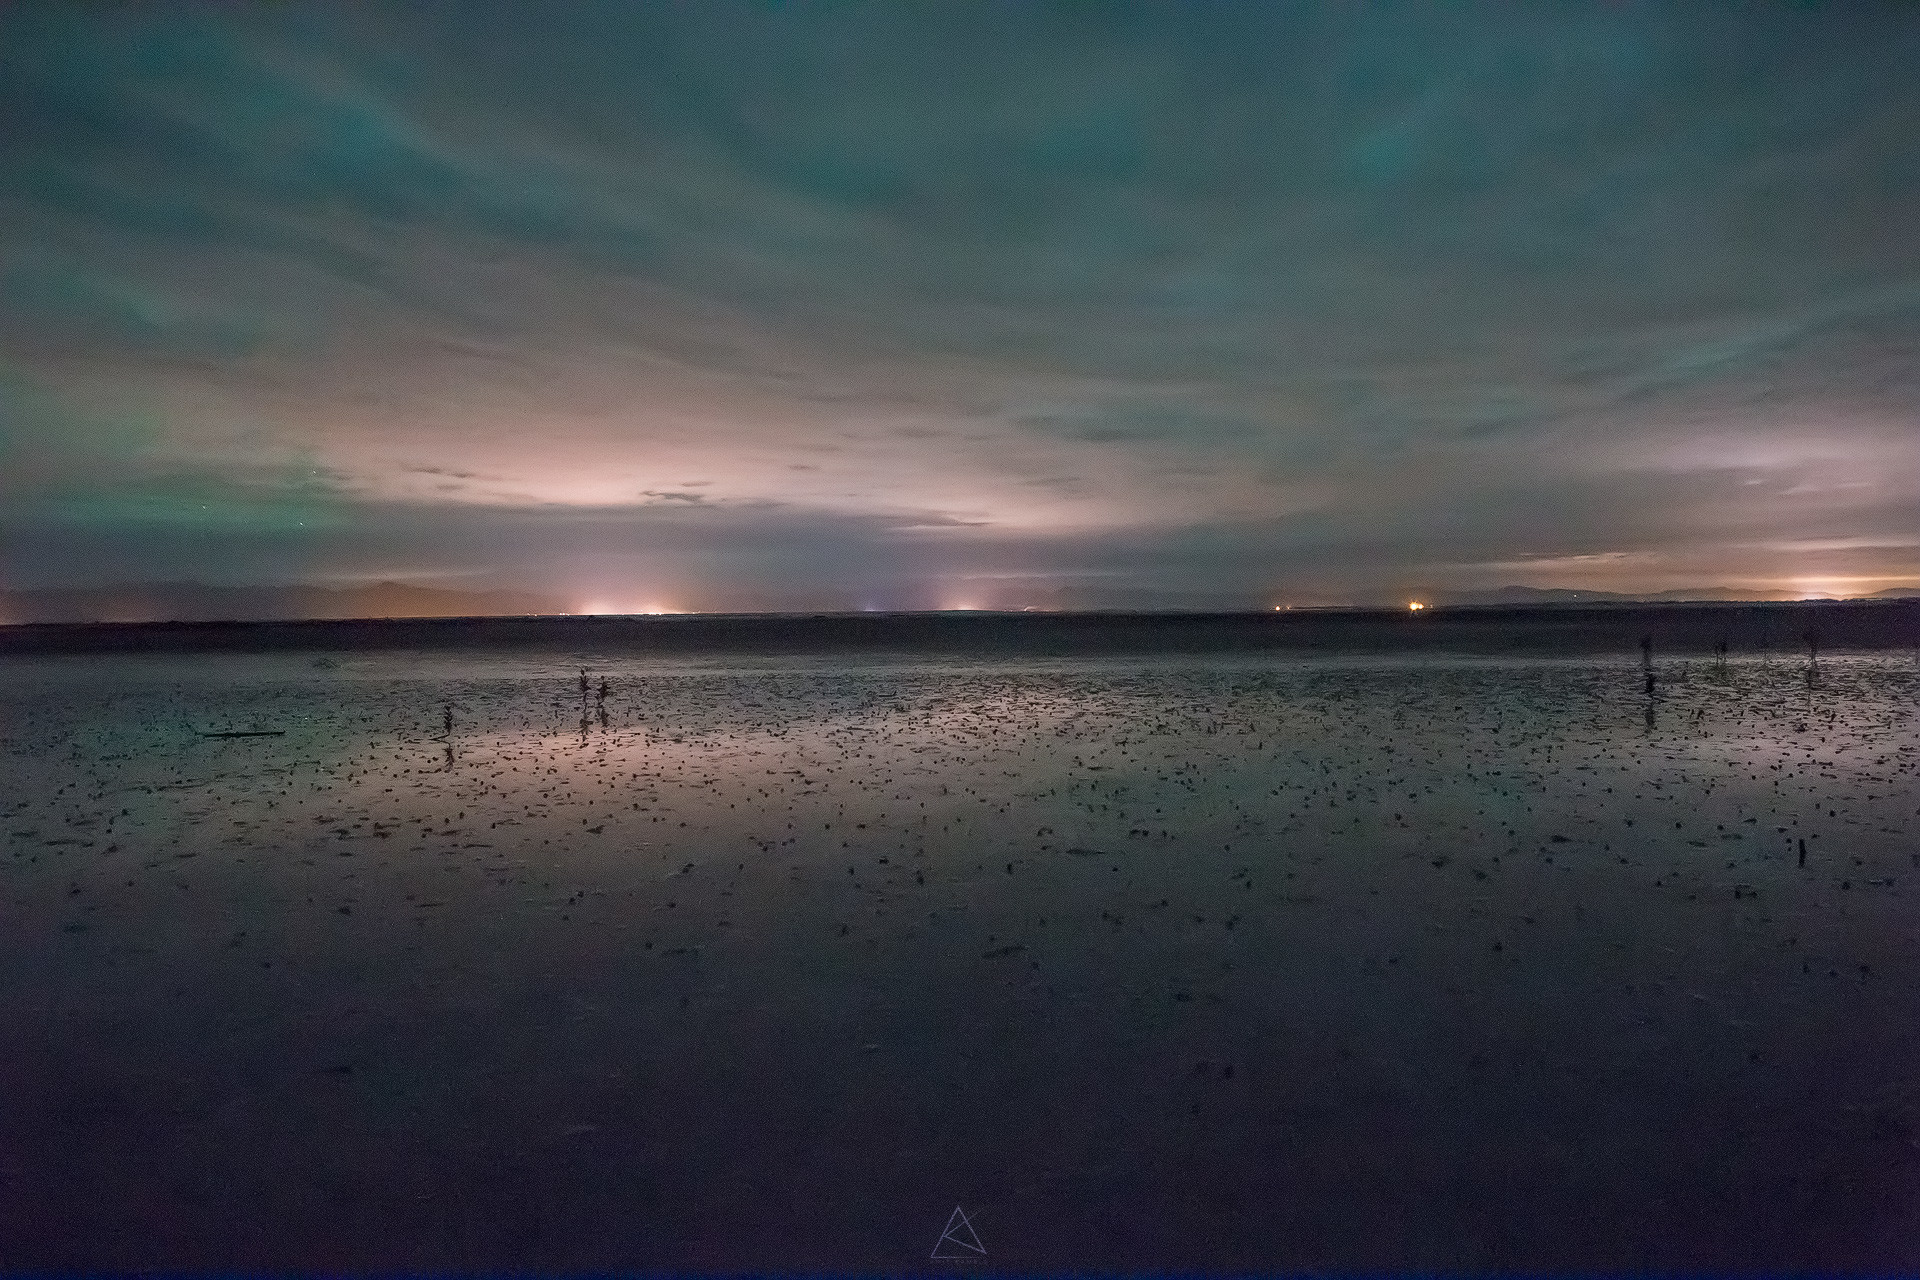
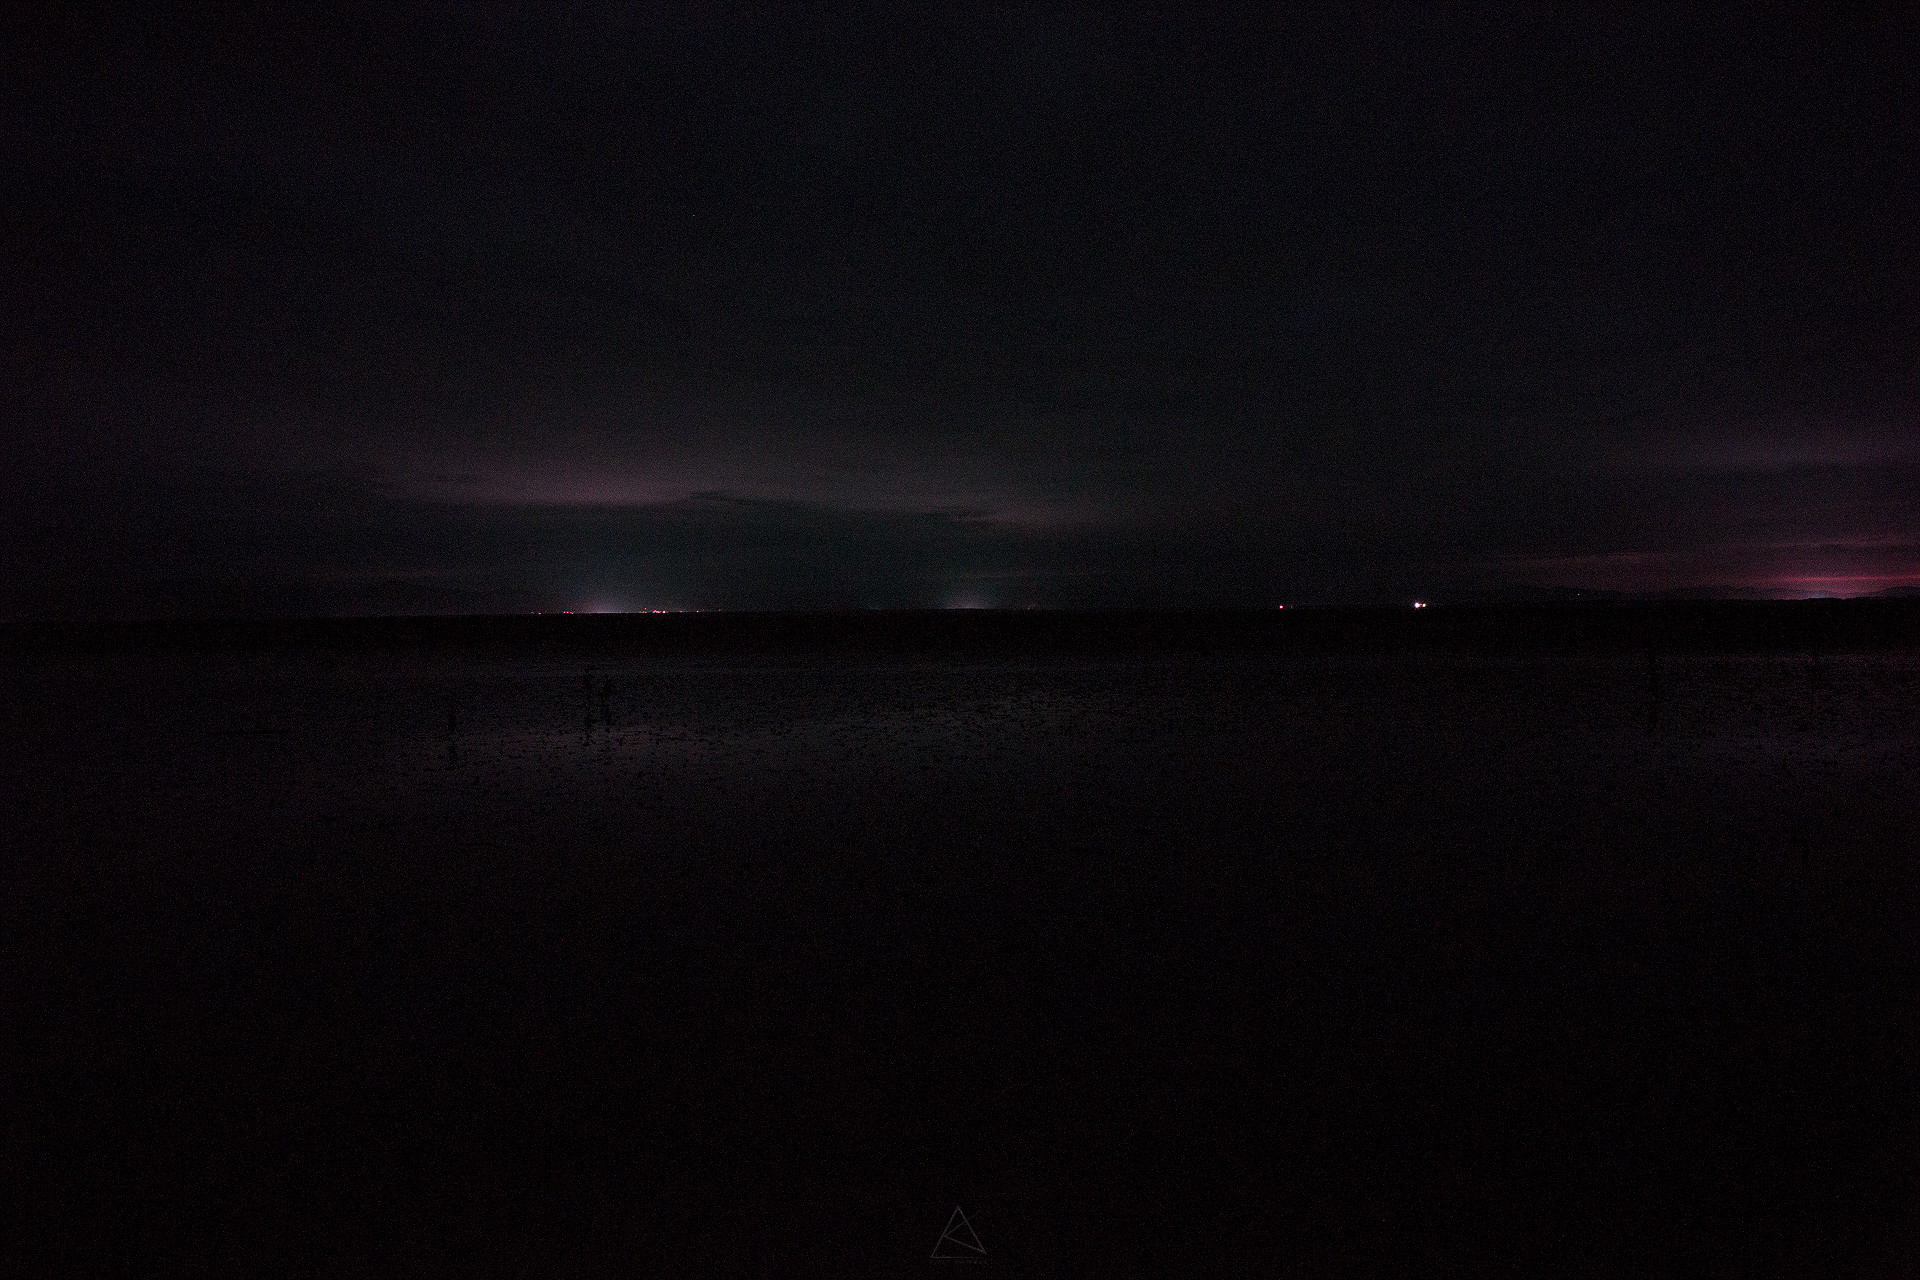
- UHC – Removes significantly more light pollution, but in turn, reduces the amount of light significantly too, would really recommend this for deep sky imaging. / Corrected (WB: 9300/-150 , Exp: +3.50)
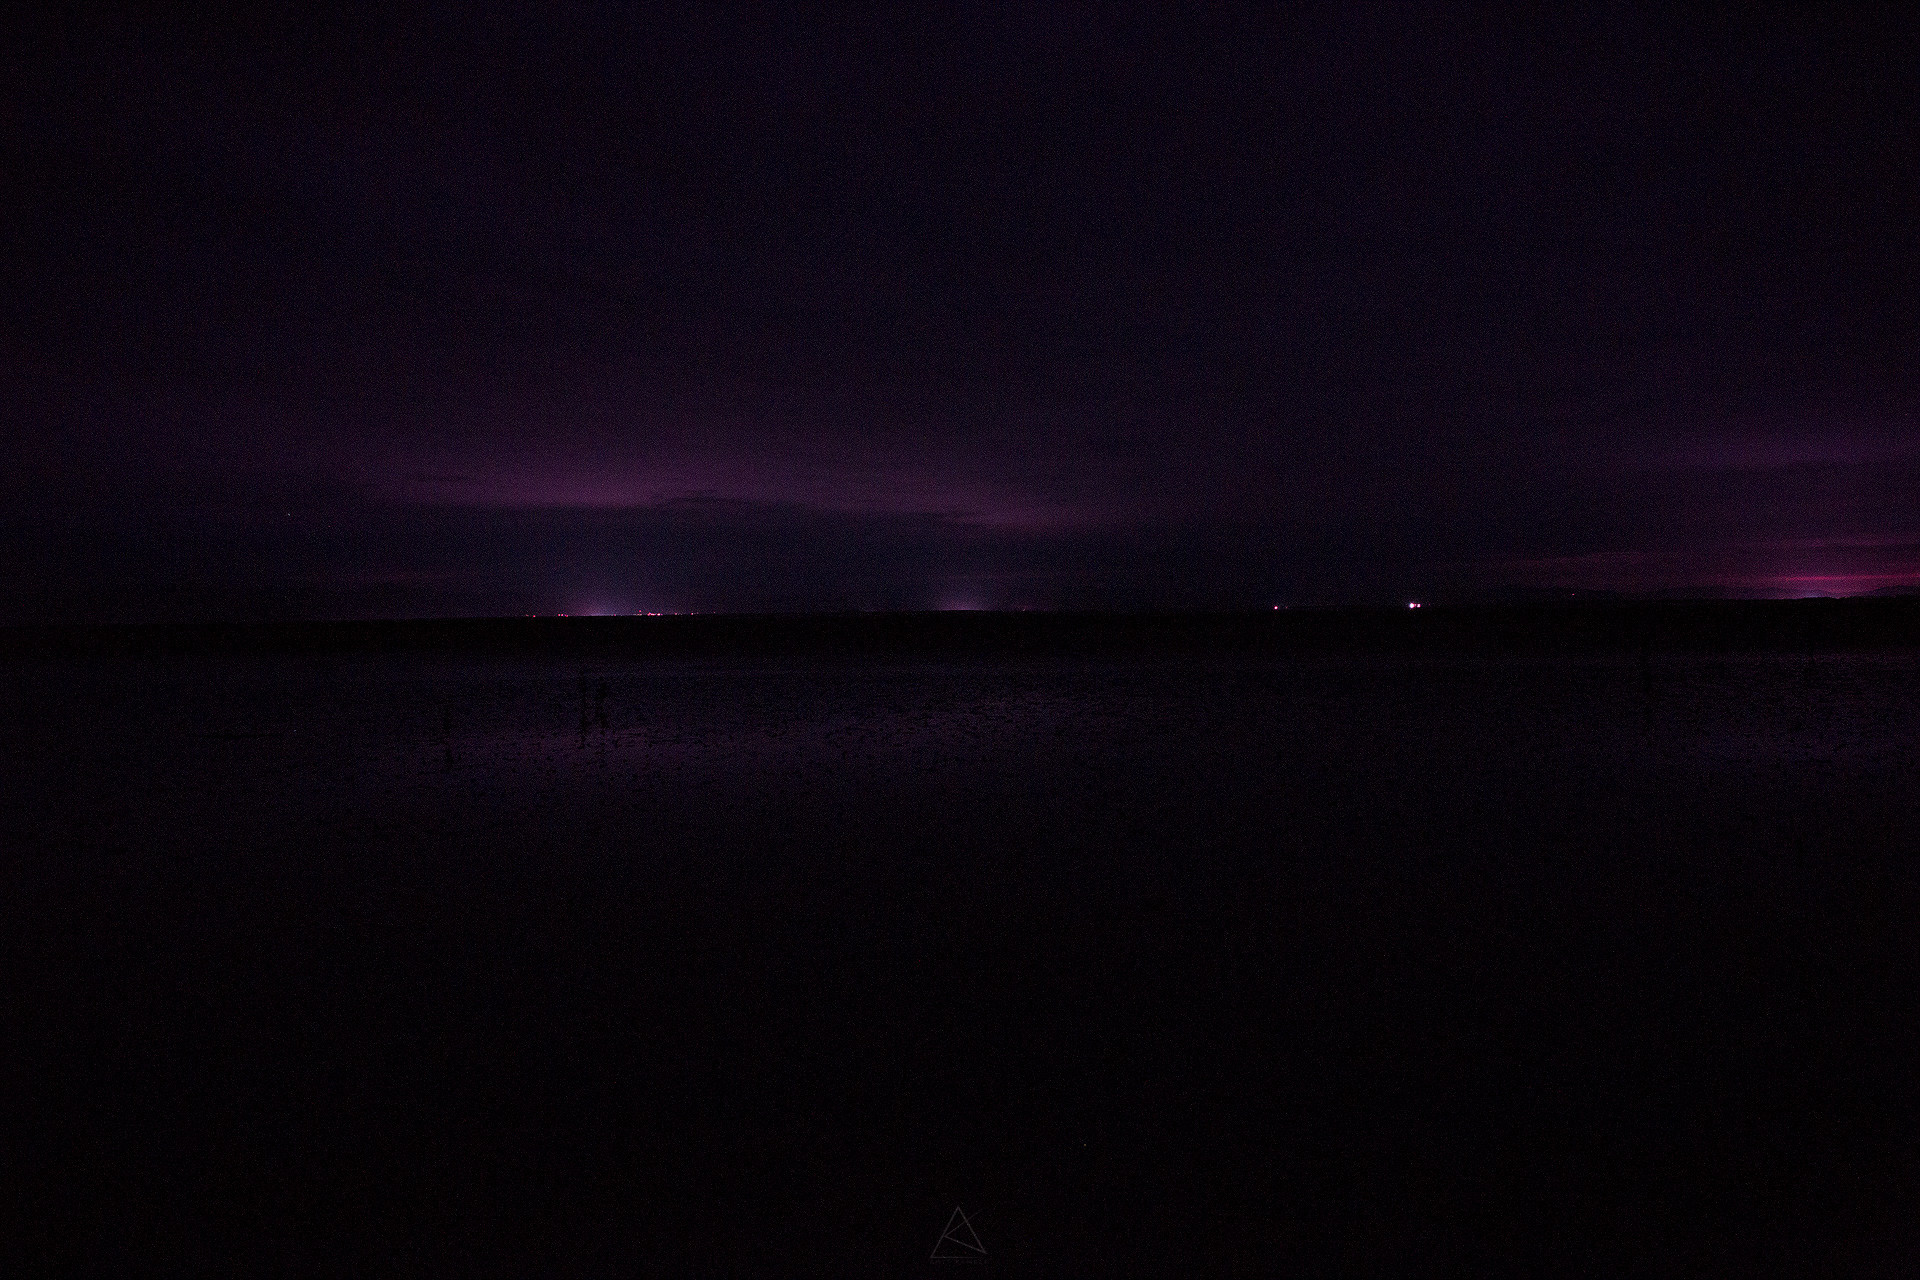
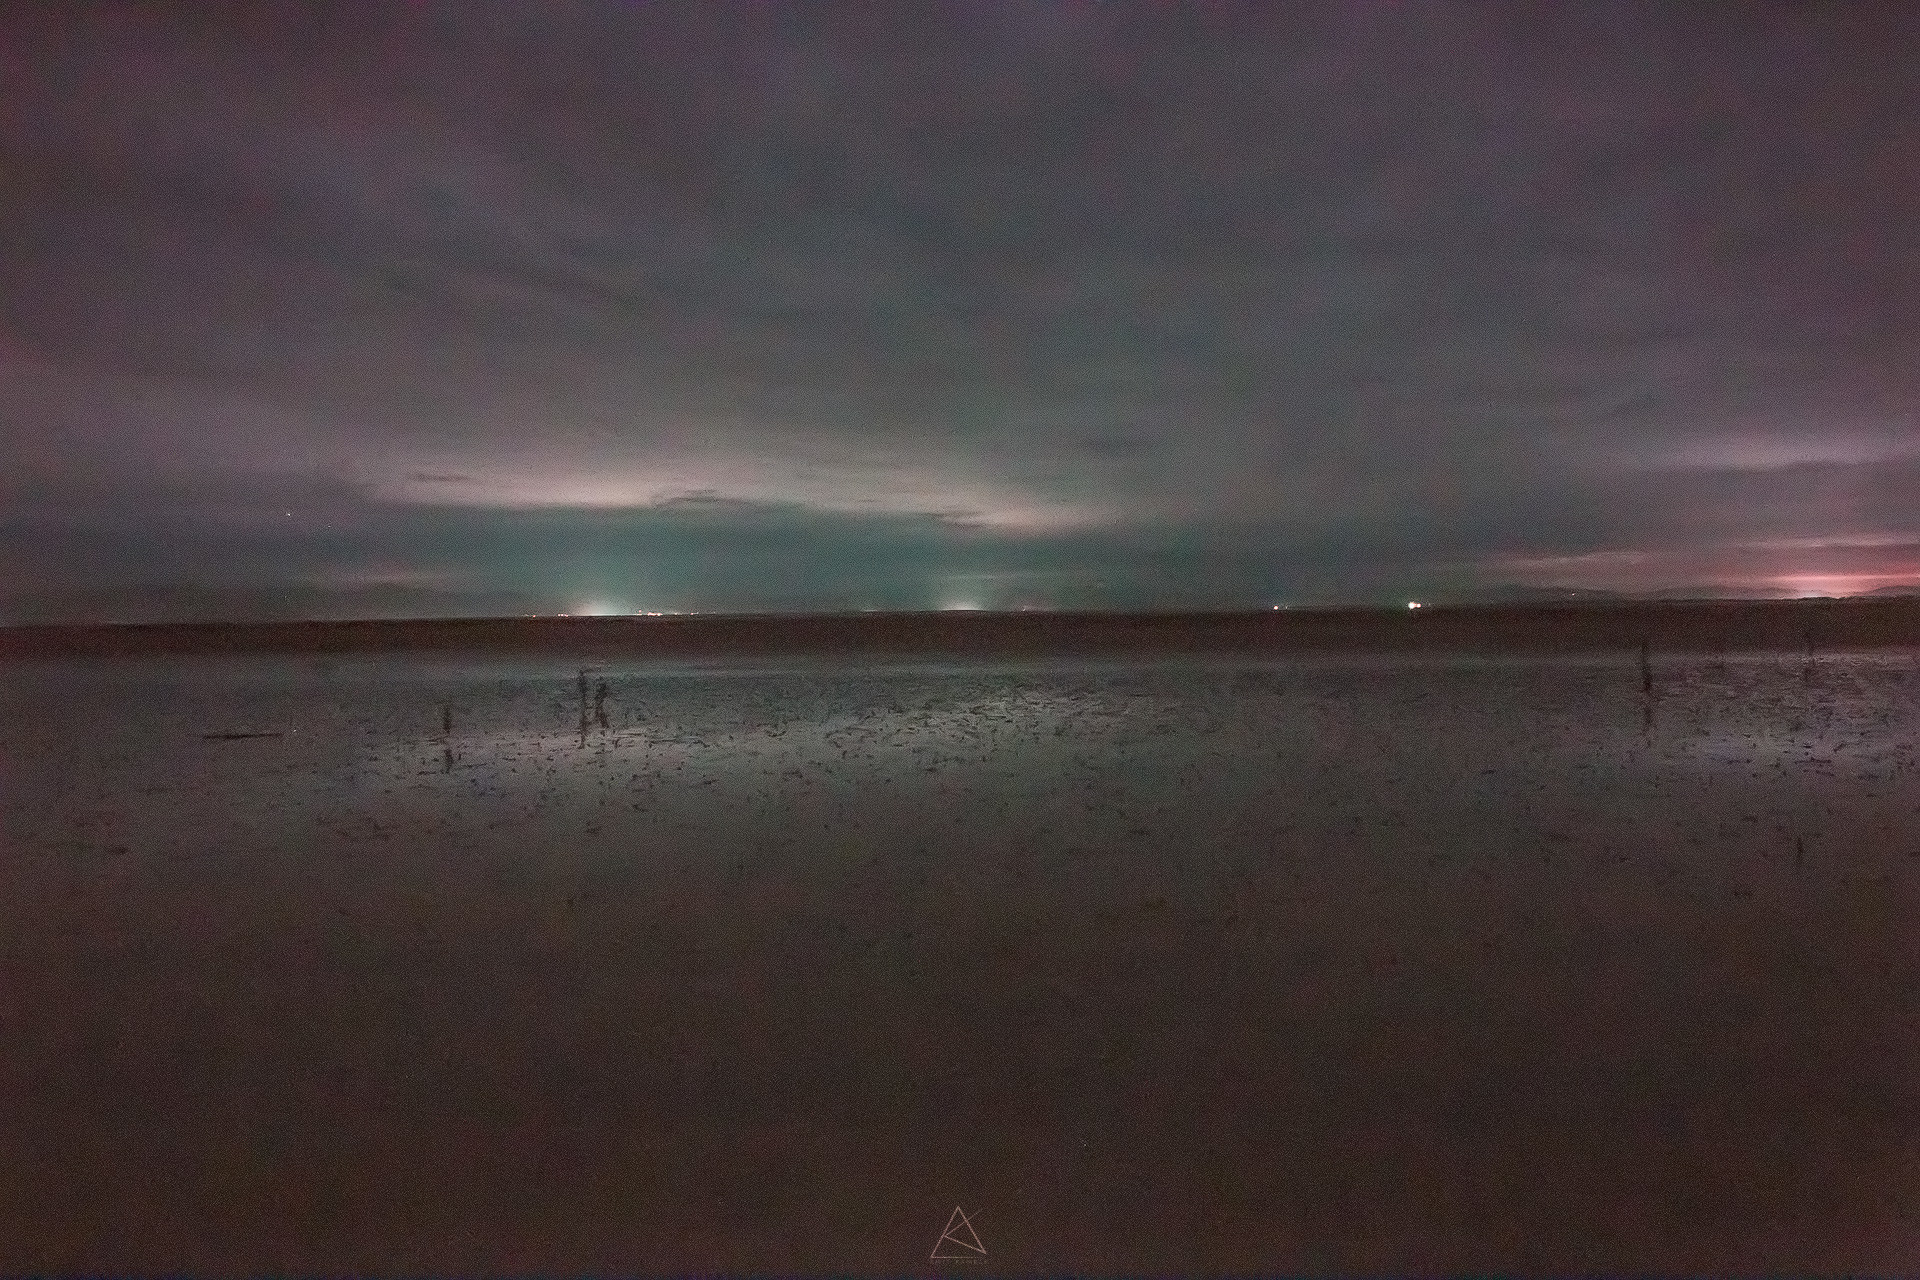
- CLS – This was again surprising as I would have expected CLS to be brighter than but they are comparatively very similar, again would recommend for deep sky. / Corrected (WB: 7100/-40 , Exp: +3.50)
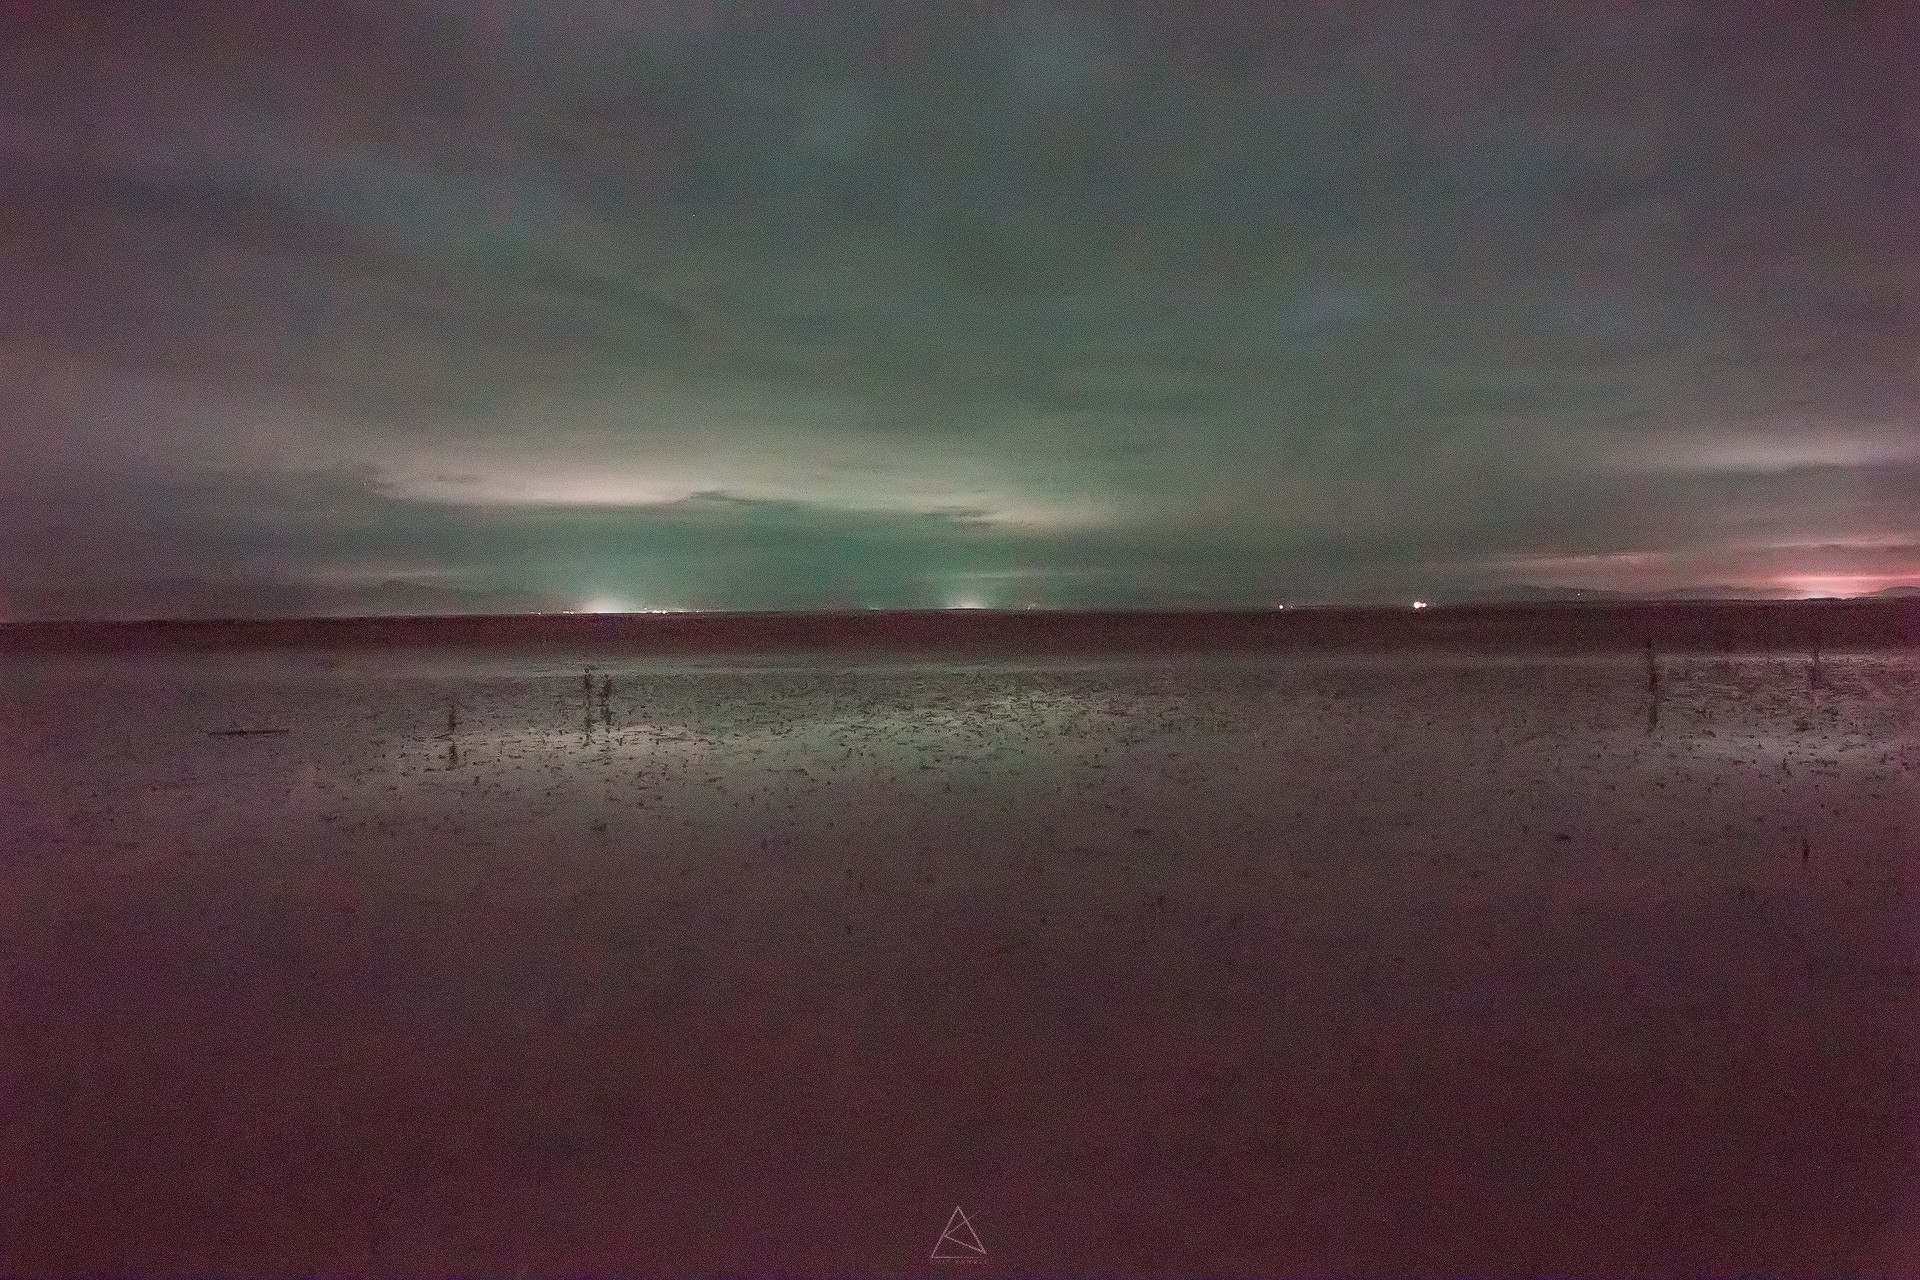
If you have come this far you are really looking to buy the filters, so here is a comparison on a clear night, from the same location.
- Control (Without any filters) / Corrected (WB: 3350/+1, Exp: 0.00)
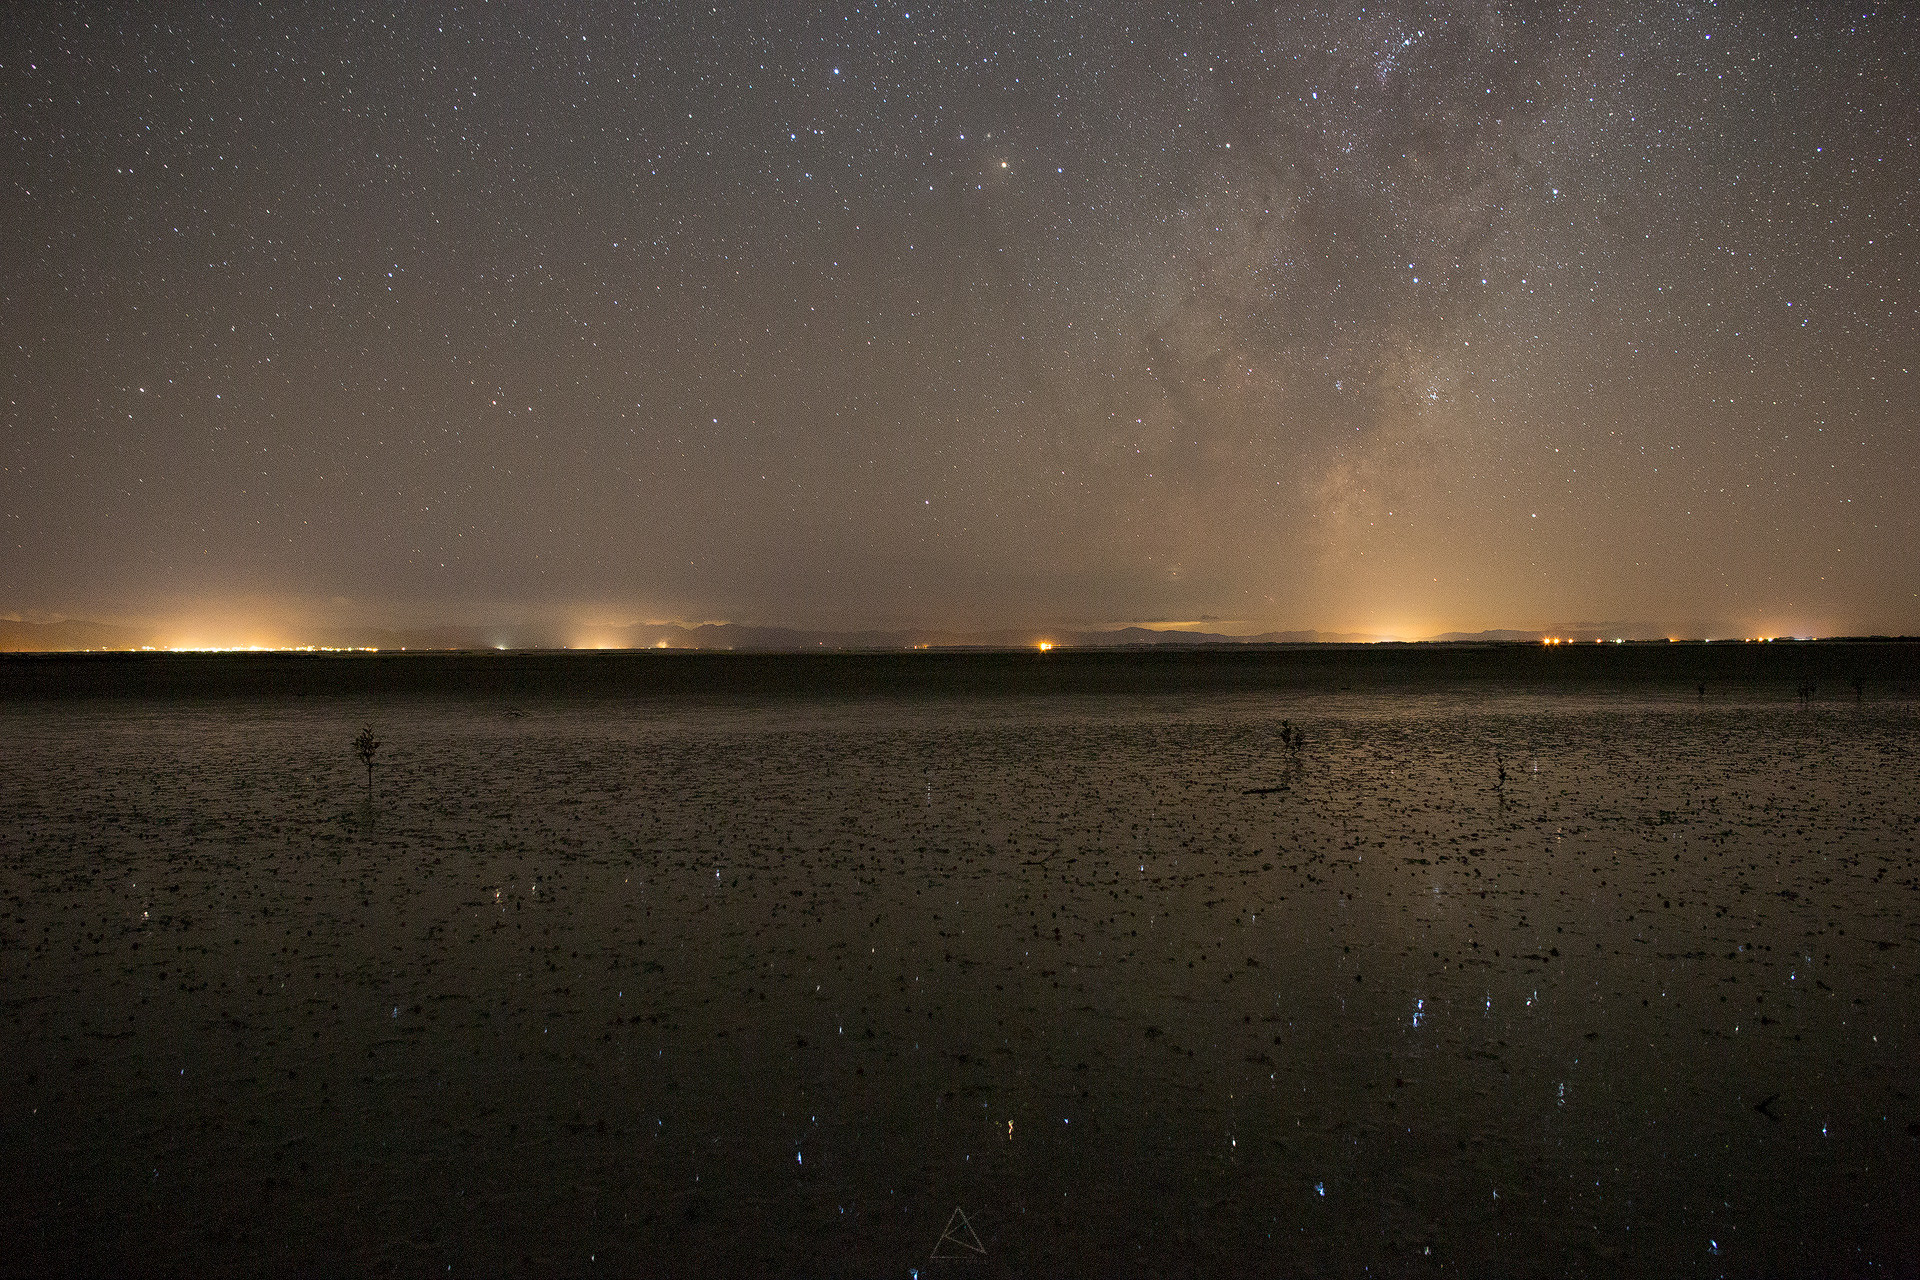
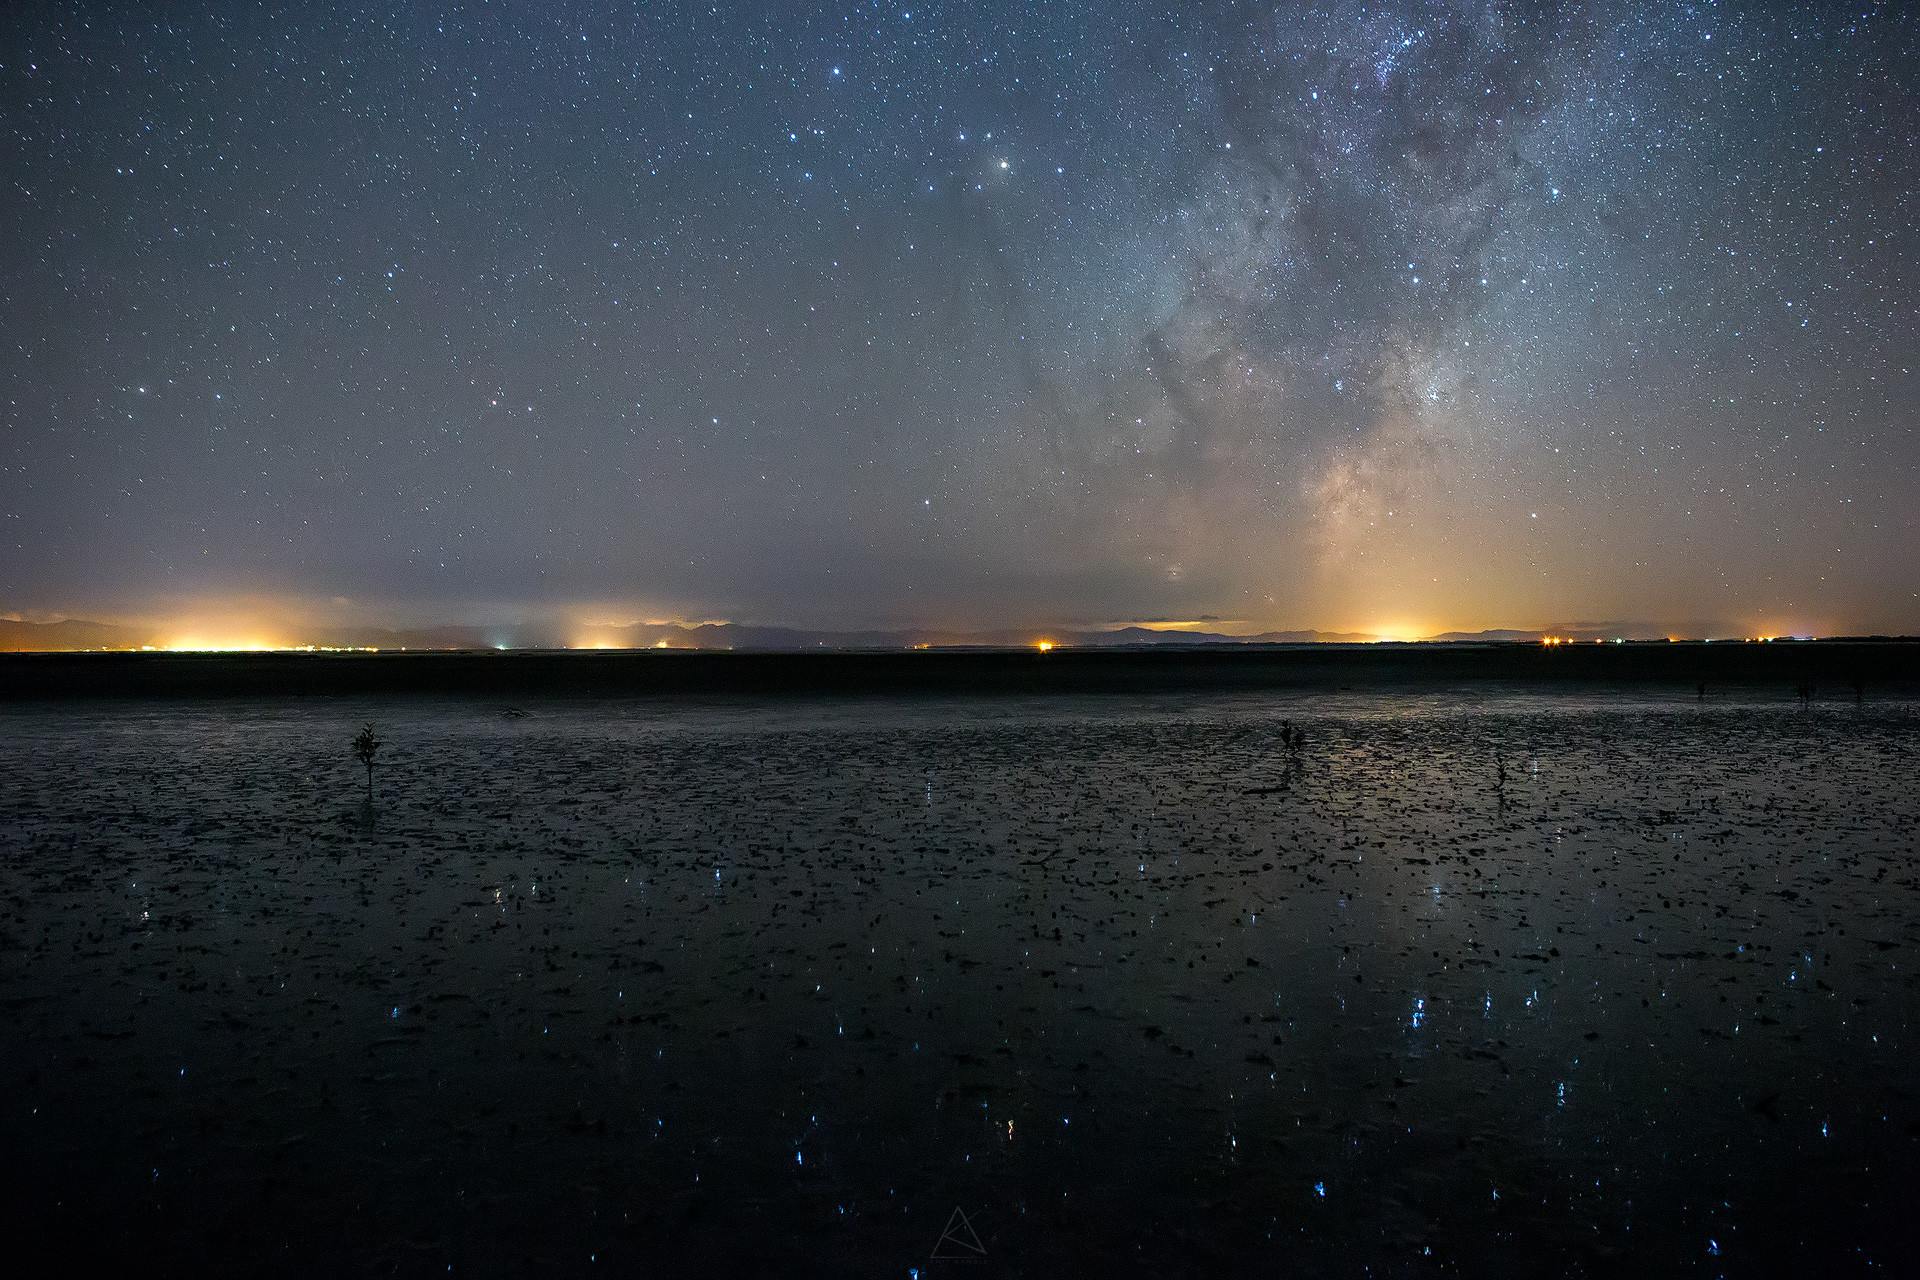
- L-Pro – Again does an exceptional job in removing the yellow light pollution, but ends up with a purple/pink colour cast. / Corrected (WB: 5050/-5, Exp: +1.30)
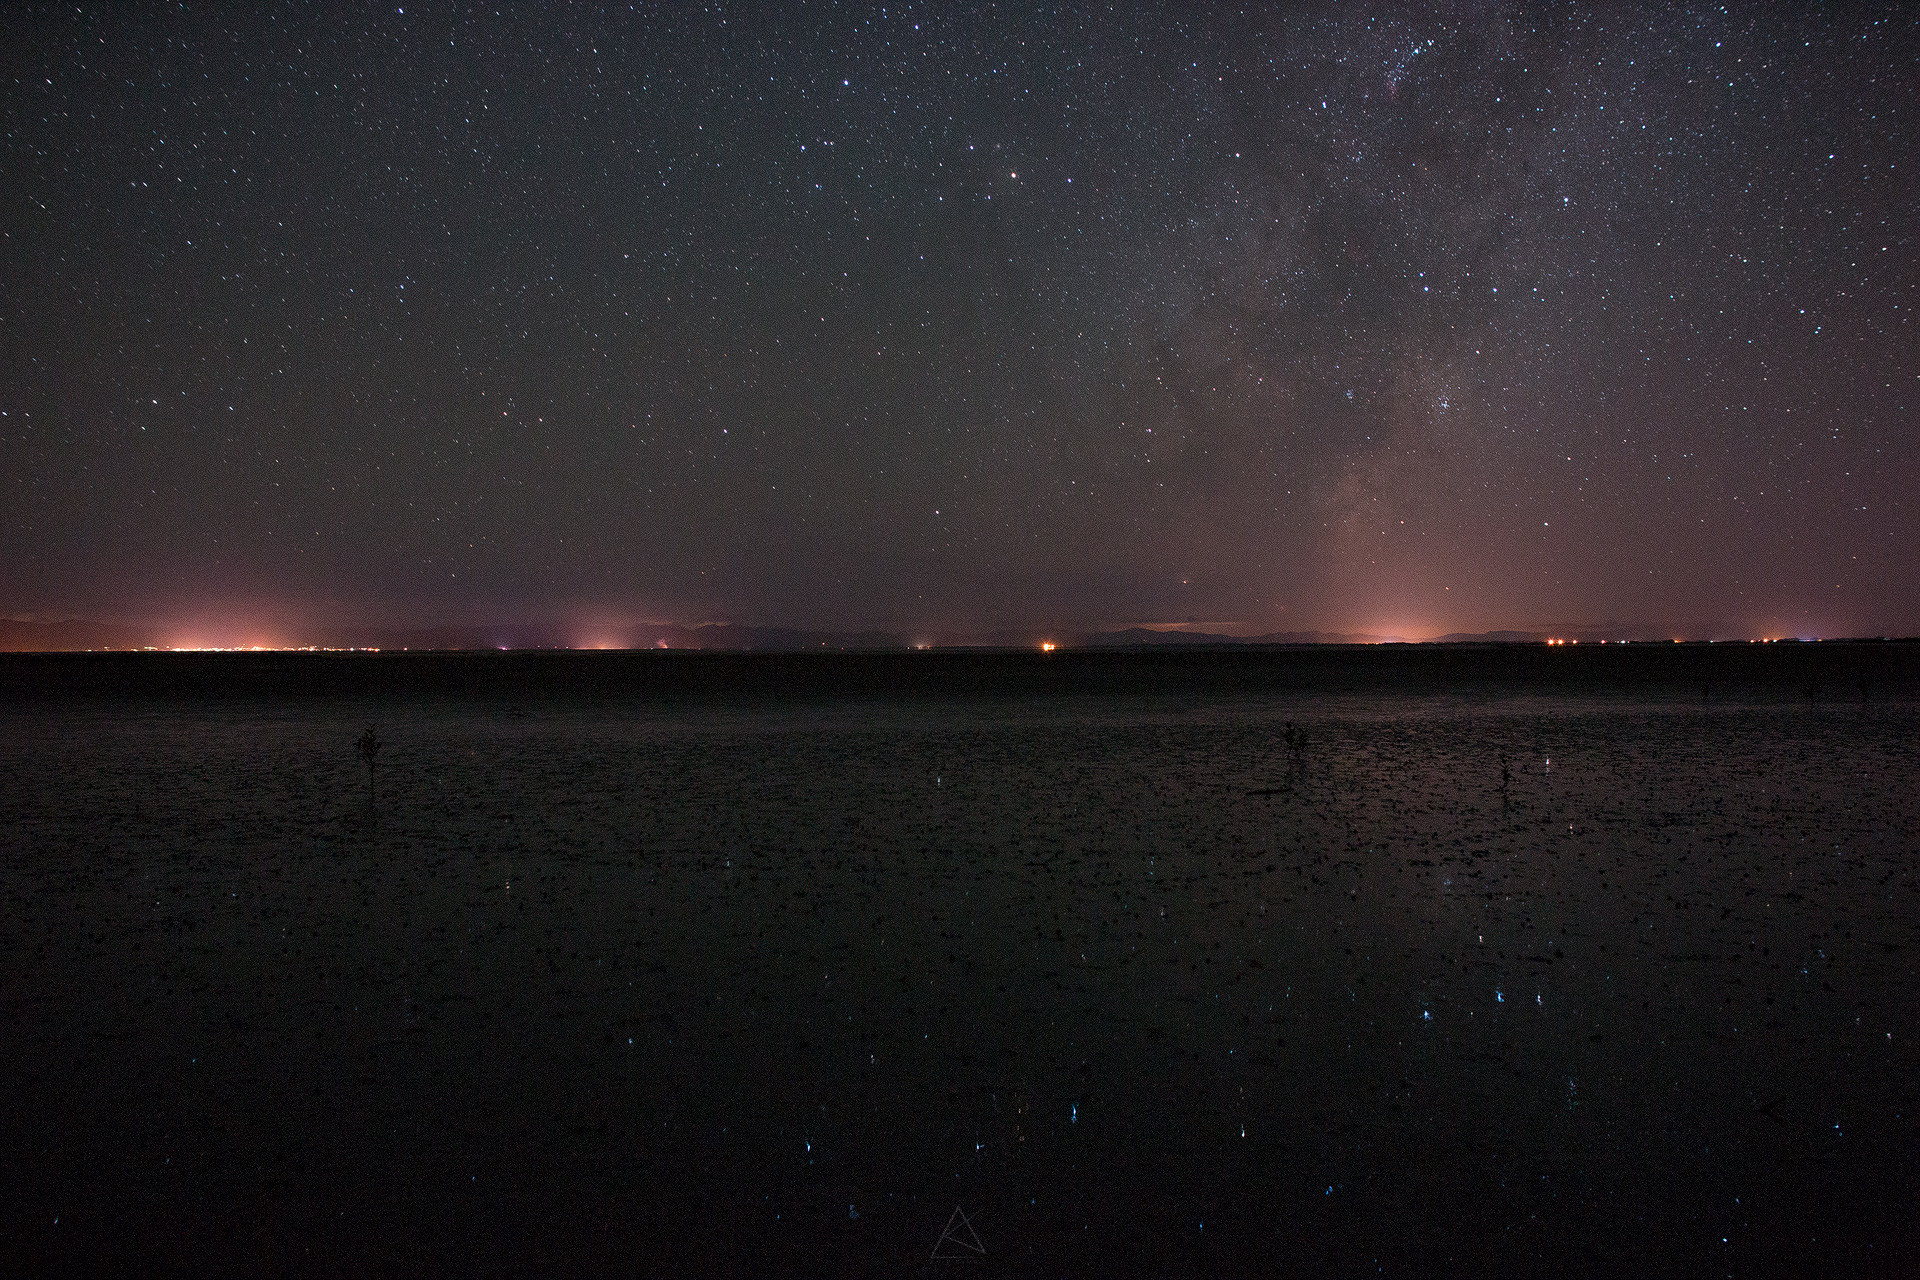
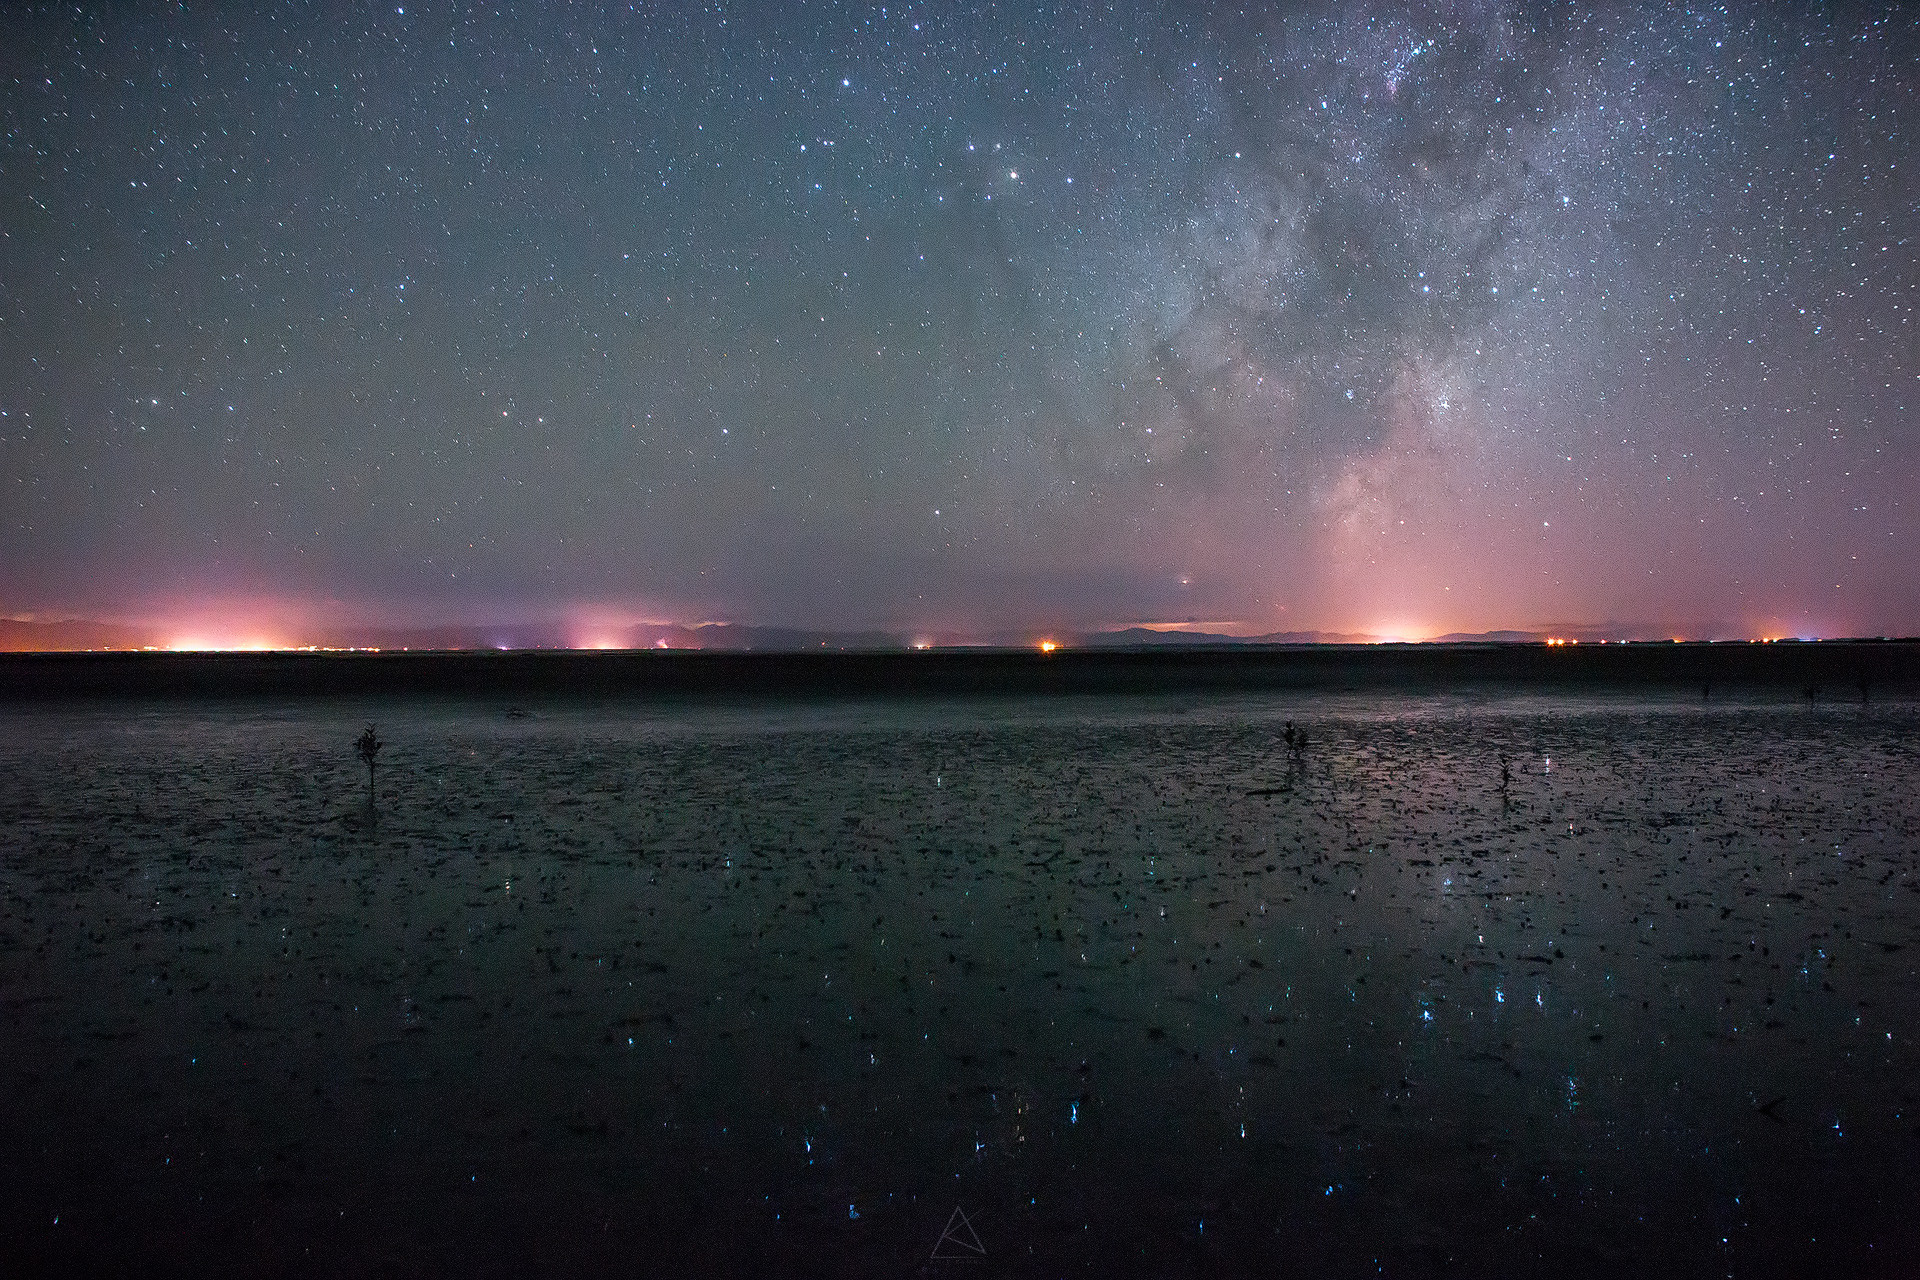
Overall Thoughts:
Considering the price these filters are available, I would say they do a pretty good gob of producing some quality images. The colour cast isn’t bad and can be easily fixed in post.
The only think thing that would be disappointing is that sometimes the filter does not fit in perfectly unless you wiggle it and try to fix it. There have been times when I could not get it to sit in properly and it kept on moving front and back which has caused the focus to change.
The filters work exceptionally well for what they are meant to do (Remove the Low-pressure Sodium and Mercury) wavelengths from the image but that means you end up with this big flare of purple/pink hue. These images were shot looking straight into the light pollution and I did this to show how well they perform, these are not really made to shoot within the city and will perform when away from the city and want to get rid of that big dome of glow.
In the image with the milky way, L-Pro was fairly easy to correct, unlike the UHC and CLS. so, would recommend this filter if you want a balance between your exposure and light pollution.
Apart from the above-mentioned points, I wouldn’t mind suggesting these to someone else (If they are sticking to a budget)
Here’s a short video on how to use the optolong filters.
